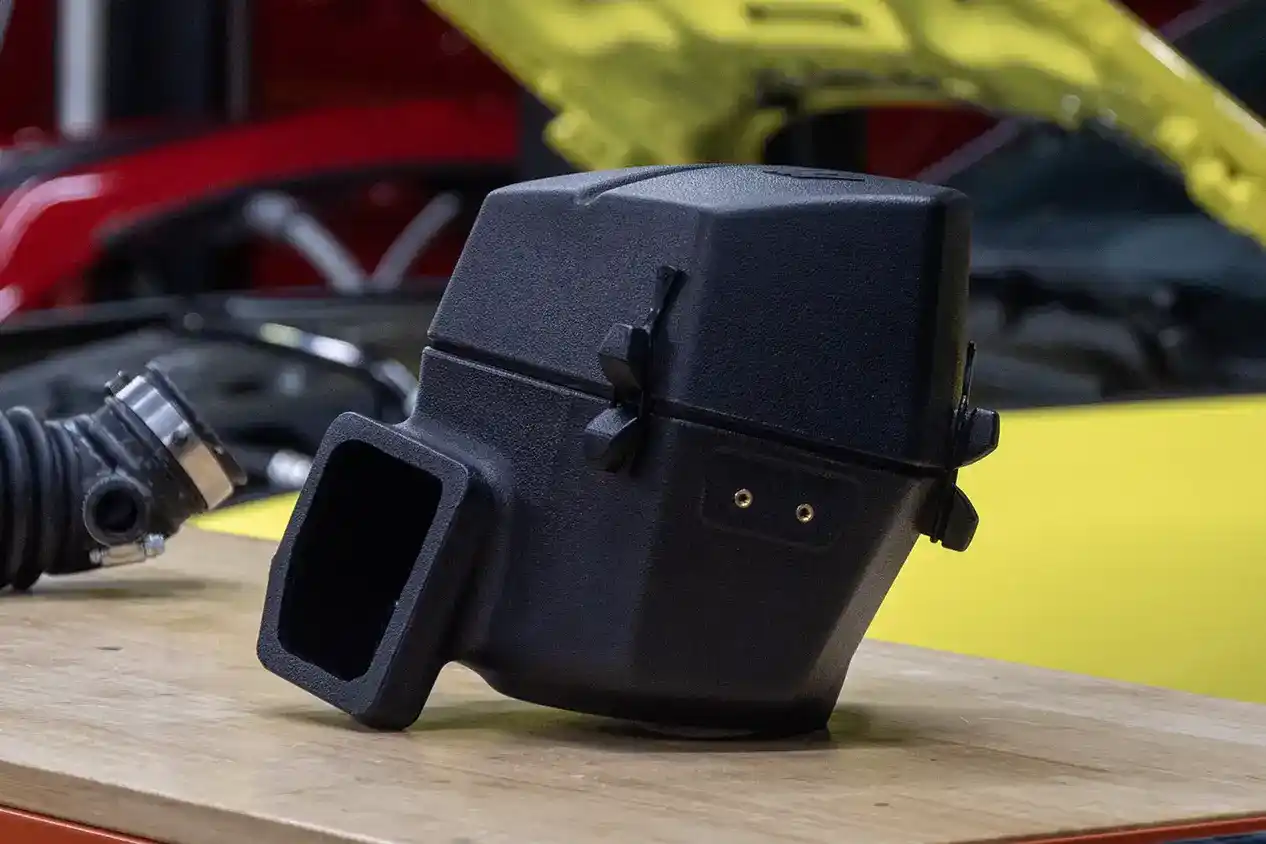
Downpipe for What - Downpipe R&D, Part 2: Creating the Prototypes
In our last post we took a look at the stock Fiesta ST downpipe as well as our slotted flange design based on the stock flange. We are still planning to create both a catted downpipe and a non-catted downpipe for race applications, so let's take a look at the progress!
Downpipe Design
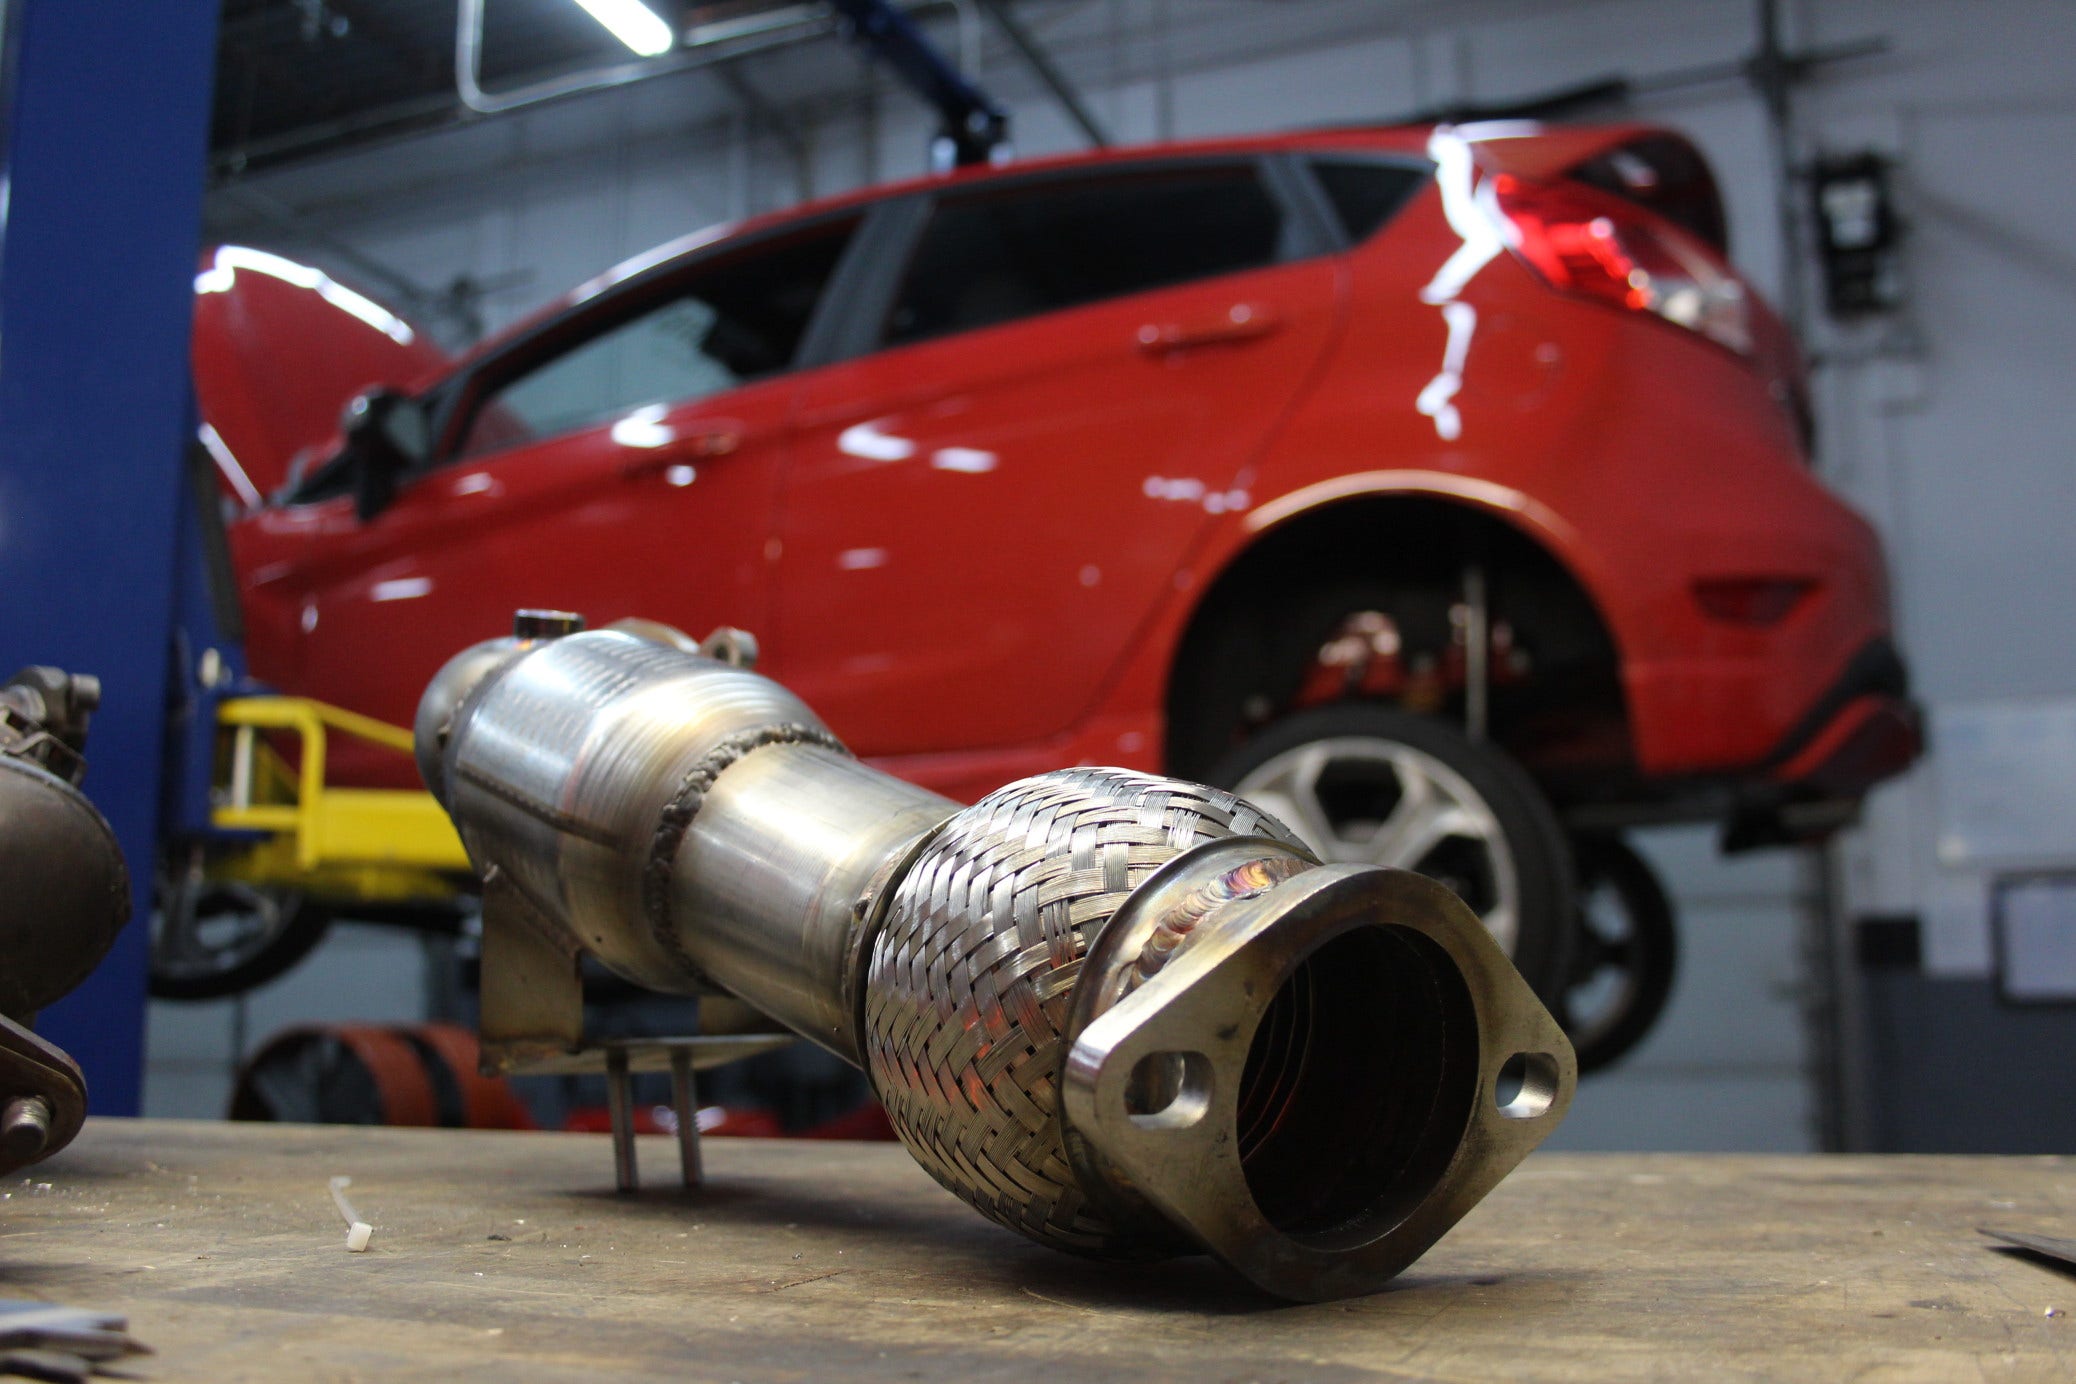
After fitting the flange to the turbo, we began to piece together the rest of the downpipe coming off the flange and meeting with the exhaust. Both our designs feature a slotted flange that bolts to the turbo, in addition to a flex pipe near where they meet with the exhaust. This is important because the entire exhaust system will move a bit, and we need a flex point to allow for this. Not allowing room for flex in the downpipe would most certainly harm your exhaust system and possibly the turbo itself.
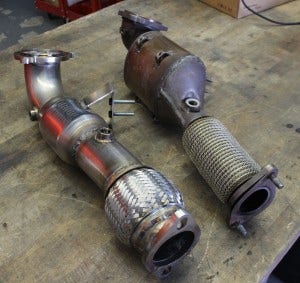
We began by laying out the components of our prototype next to the stock Fiesta ST downpipe for comparison. Check out some shots below!

Layout of piping to create the catted Fiesta ST downpipe
Fabrication
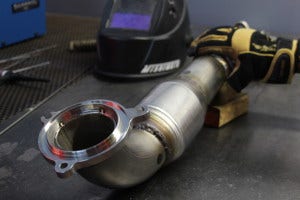
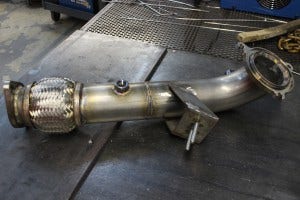
This project is unique in that part of the fabrication was done with the prototype downpipe components installed on the car! The lower flange was created and welded to the flex pipe section, which was then bolted to the exhaust. All measurements were done with the stock exhaust to ensure excellent fitment, even if you choose to stick with the stock exhaust on your Fiesta!
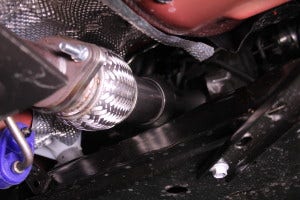
Catted downpipe fitted on the Fiesta ST
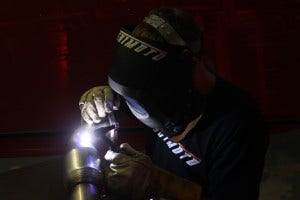
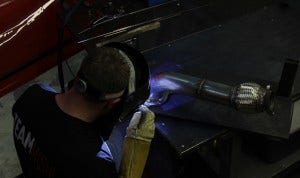
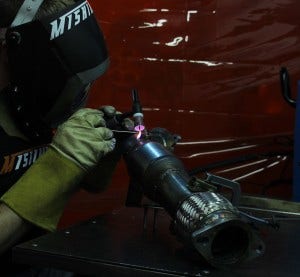
The rest of the downpipe portions were fitted and tack-welded in place for the best possible fitment. This required some welding yoga to get the job done, but it was worth it! Check it out!
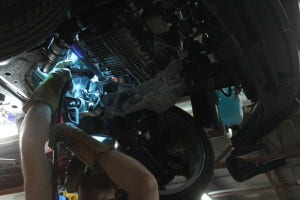
Welding some Fiesta ST parts
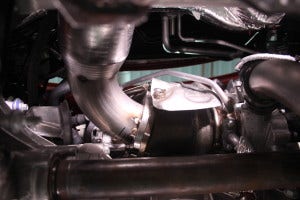
Fiesta ST downpipe fitted on the turbo
Fiesta ST downpipe fitted on the turbo
Once all the pieces of the downpipe were tack-welded together, the entire downpipe was unbolted and removed from the car so that it could be welded completely. These particular Fiesta ST parts required quite a bit of welding. Each portion of the pipe had to be welded together to form the perfect sequence of bends. Much like the exhaust, the welds must be perfectly leak free so as not to skew test results with a leak.
Welding some Fiesta ST parts
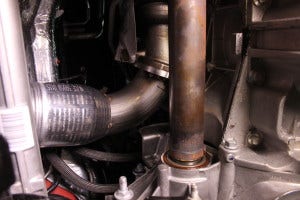
Flange welded on the Fiesta ST downpipe
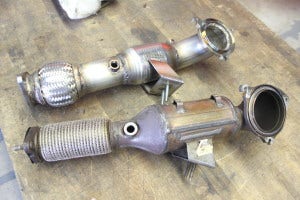
The downpipes are starting to come together! Once we had the catted downpipe nearly complete, we repeated the fitting and welding process for the non-catted downpipe.
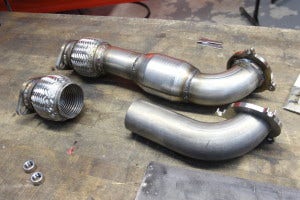
Creating the non-catted Fiesta ST downpipe

Creating the non-catted Fiesta ST downpipe
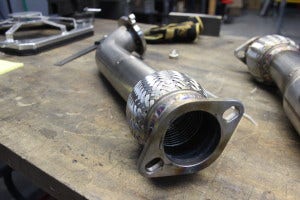
The non-catted Fiesta ST downpipe tack-welded together
The non-catted Fiesta ST downpipe tack-welded together
The non-catted down pipe is tack-welded and looking good! We finished welding the entire downpipe in preparation for test-fitting.
Welding some Fiesta ST parts
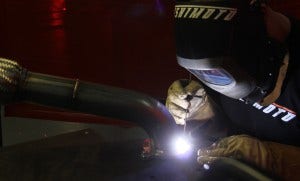
Welding some Fiesta ST parts
The bracket is one of the final touches on this work of art. We want our bracket to be as close as possible to the stock bracket in both shape and location. This will allow us to achieve excellent fitment with both the stock and aftermarket exhausts! Incorporating a bracket into our design will provide for more secure mounting and prevent damage to the exhaust system (and possibly the turbo) resulting from too much movement of the downpipe. We tack-welded our bracket to the catted downpipe so we could check fitment of the completed prototype.
Tack-welding the bracket of the Fiesta ST downpipe
Tack-welding the bracket of the Fiesta ST downpipe
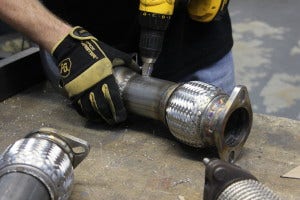
Drilling holes for the O2 bungs
Welding some Fiesta ST parts
Two holes were drilled in the downpipe to accommodate bungs for the oxygen (O2) sensors. We chose close-to-stock placement of the O2 sensors to allow for use with the stock sensors, making installation more straightforward. That's all for our downpipe prototype designs! Check out some shots of our completed prototypes below!

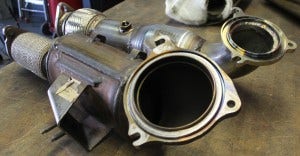
Finished prototype of the Fiesta ST downpipe
Finished prototype of the Fiesta ST downpipe
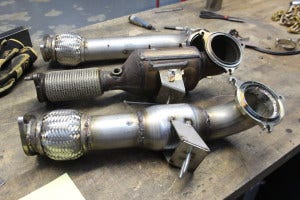
Lineup of Fiesta ST parts
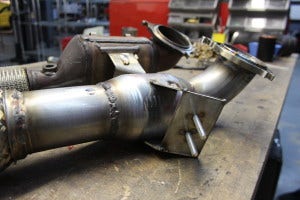
Finished prototype of the catted Fiesta ST downpipe
Finished prototype of the non-catted Fiesta ST downpipe
Coming Up!
As mentioned in our previous post, both our prototypes feature full three-inch pipe with a small step down after the flex pipe. By increasing the size of the downpipe, it allows the turbo to spool more quickly, which should produce an increase in power for this little Fiesta. Speaking of power, next up we will be testing to see what this downpipe can do. Check back to see Mishimoto's Fiesta ST Downpipe take on the dyno!
Thanks for Reading!
-Sara