
Prepare for Adventure - Catch Can R&D, Part 2: Design
Imagine driving your brand-new 3.6L Jeep Wrangler JL up a
steep, rocky grade. Your tires struggle to grip the rocks and loose soil, but
you persevere, steadily making your way to the top. You look back to see the
faces of your friends, hoping they'll be amazed and thinking the same thing you
are, "Wow, this Jeep can take on anything!" But you can't see them, because
they've been enveloped in a plume of blue-white smoke that's still billowing
from your exhaust. Instead of impressing everyone and selling at least four JL Wranglers in the
process, all you've manage to do is drive up a hill in a James Bond-esque smoke
screen.
Before you start worrying about piston rings and head
gaskets, you might want to investigate your CCV system. Blow-by accumulation
can wreak havoc on your intake and upper engine (and the lungs of anybody
spectating). Even a properly functioning CCV/PCV system can allow a large
amount of blow-by to pass through into the intake. Luckily, we've been working
on a solution to stop that blow-by from ruining the view of your epic driving.
When we last saw our 2018+ Jeep Wrangler JL 3.6L catch
can"well, you couldn't see it. Because it didn't exist yet. But in this post,
it will.

The first step in creating a direct-fit catch can kit for
any vehicle is to determine where the catch can will live. To do this, we often
turn to our Faro 3D scanner to map out the engine bay and make prototyping much
faster. Our engineers can scan the area where they want to mount the catch can,
then design and test-fit a bracket in a 3D space before we even make one out of
metal. This process lets us get the best fit possible without wasting time or
materials on physical prototypes. The project engineer, Ye, began by scanning
the driver-side fender rail and firewall. This area would give us the
straightest shot to the intake and PCV ports and leave plenty of room for the
bracket and can. With the 3D model generated, Ye returned to her computer to
design the digital bracket.

A short time later, the digital bracket was ready to come
to life. Our fabricator took the digital file Ye had created to our waterjet
and cut the bracket out of steel. Our first iteration of the bracket placed the
catch can directly above the brake booster. This left plenty of room around the
can to reach in and unscrew it from its base, but we quickly realized the can
would not have enough room to drop down off the baffle. We couldn't move the
can up without hitting the hood, so Ye returned to her 3D scan data and gave the
bracket a new home.
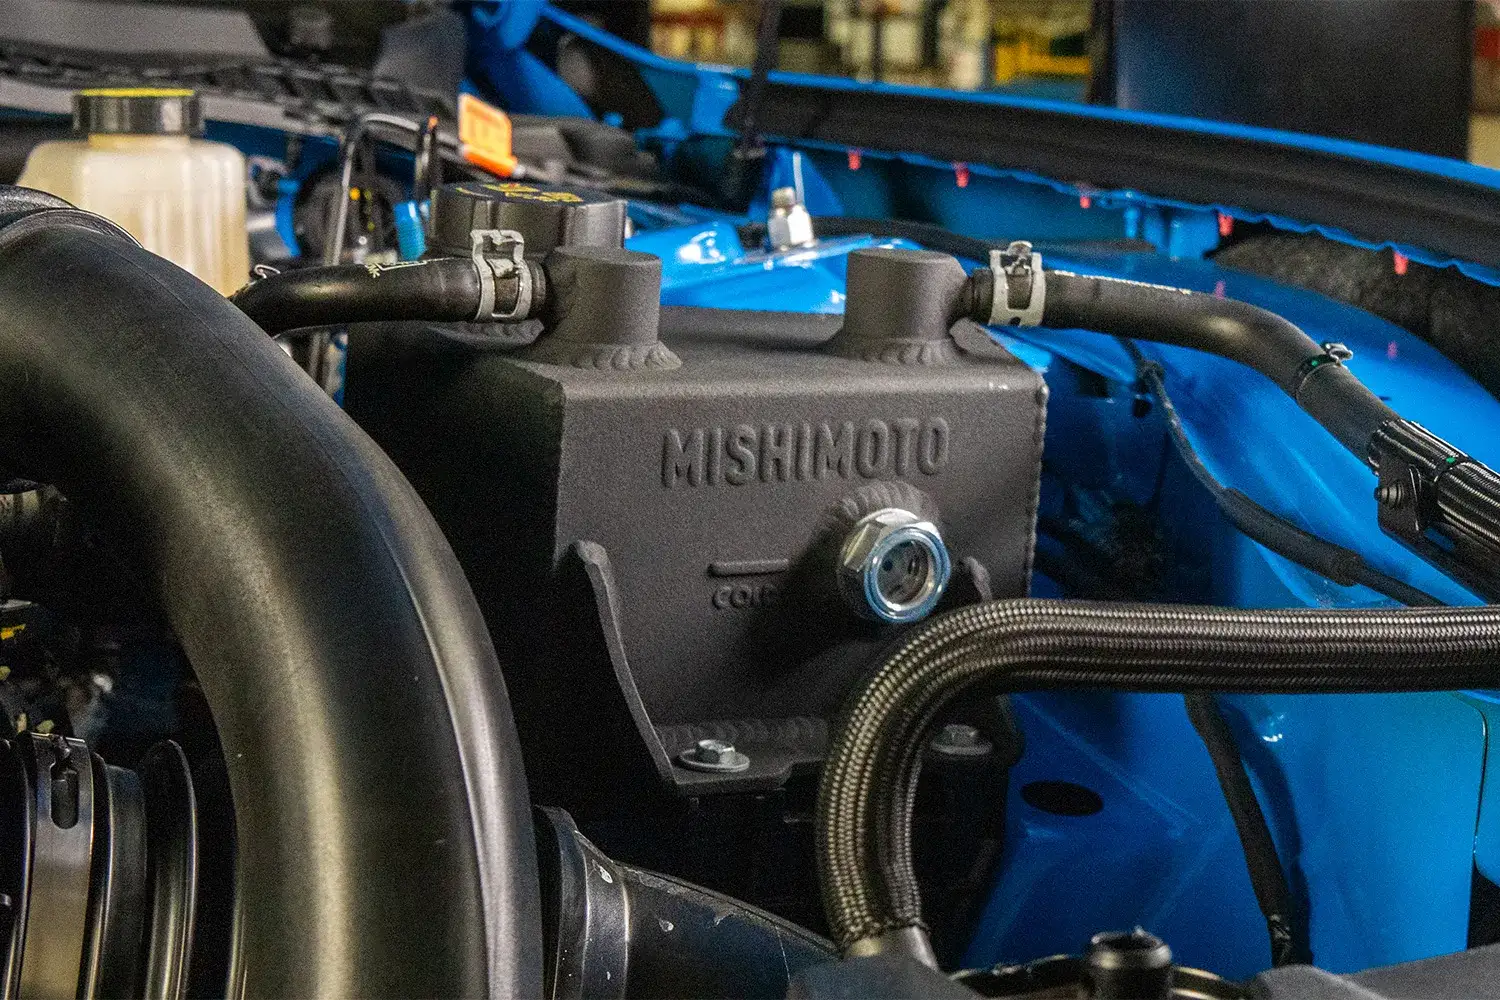
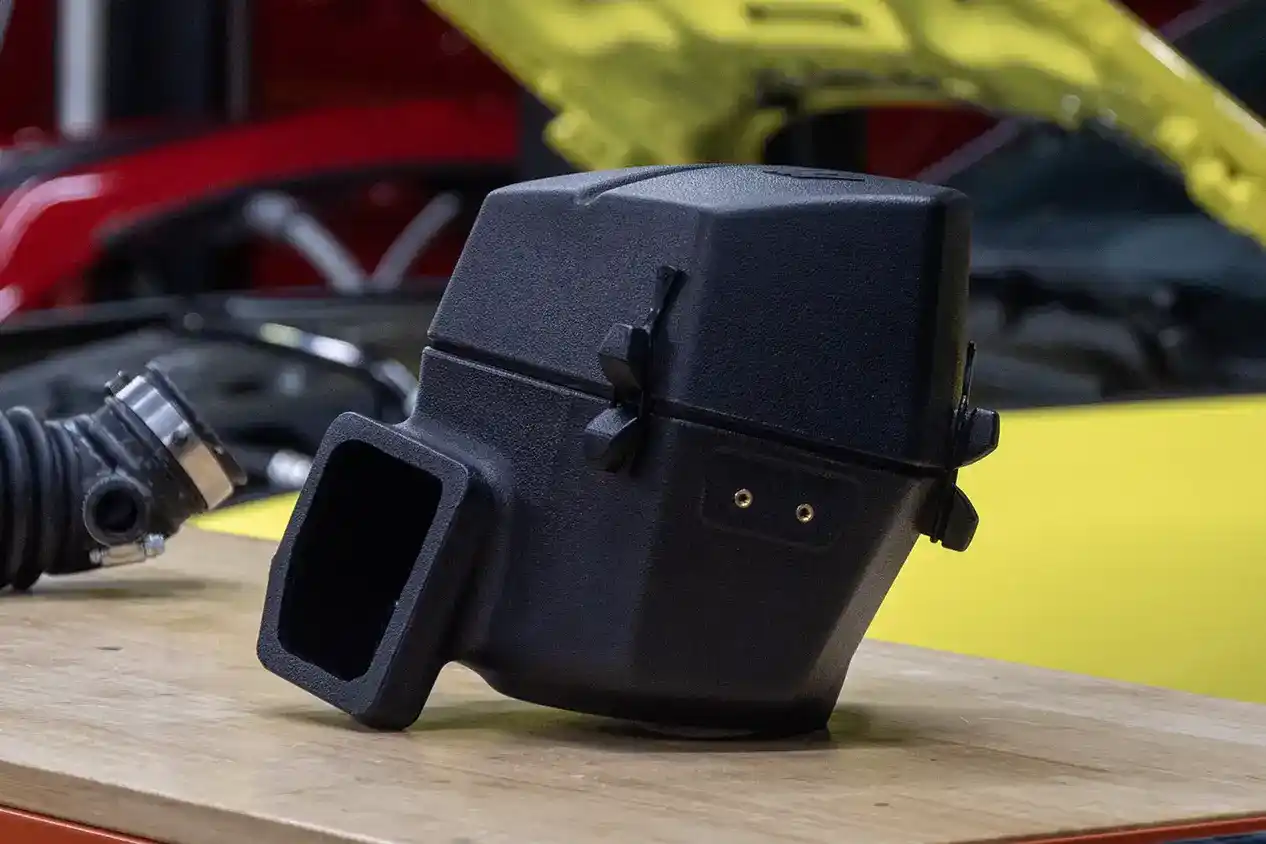
This time, the catch can was mounted to the driver side fender rail to the right of the brake booster. A cavernous opening below the can and plenty of room on three sides would make servicing effortless. As an added bonus, the large opening under the can leads behind the fender liner and makes adding a drain kit even easier. We've seen from our previous projects that the Pentastar engine can produce a large amount of blow-by, so this could come in handy later.

All that was left to do was plumb the lines that would
intercept the blow-by and carry it to the catch can, then send the volunteer JL
out into the world. When we return to this project in 1,000 miles, we'll see
just how much blow-by our catch can stopped from entering the intake. Keep an
eye out for our next update and, as always, let us know what you think!