
Powering Perfection - Performance Heat Exchanger R&D - Concept, Design, and Production Sample
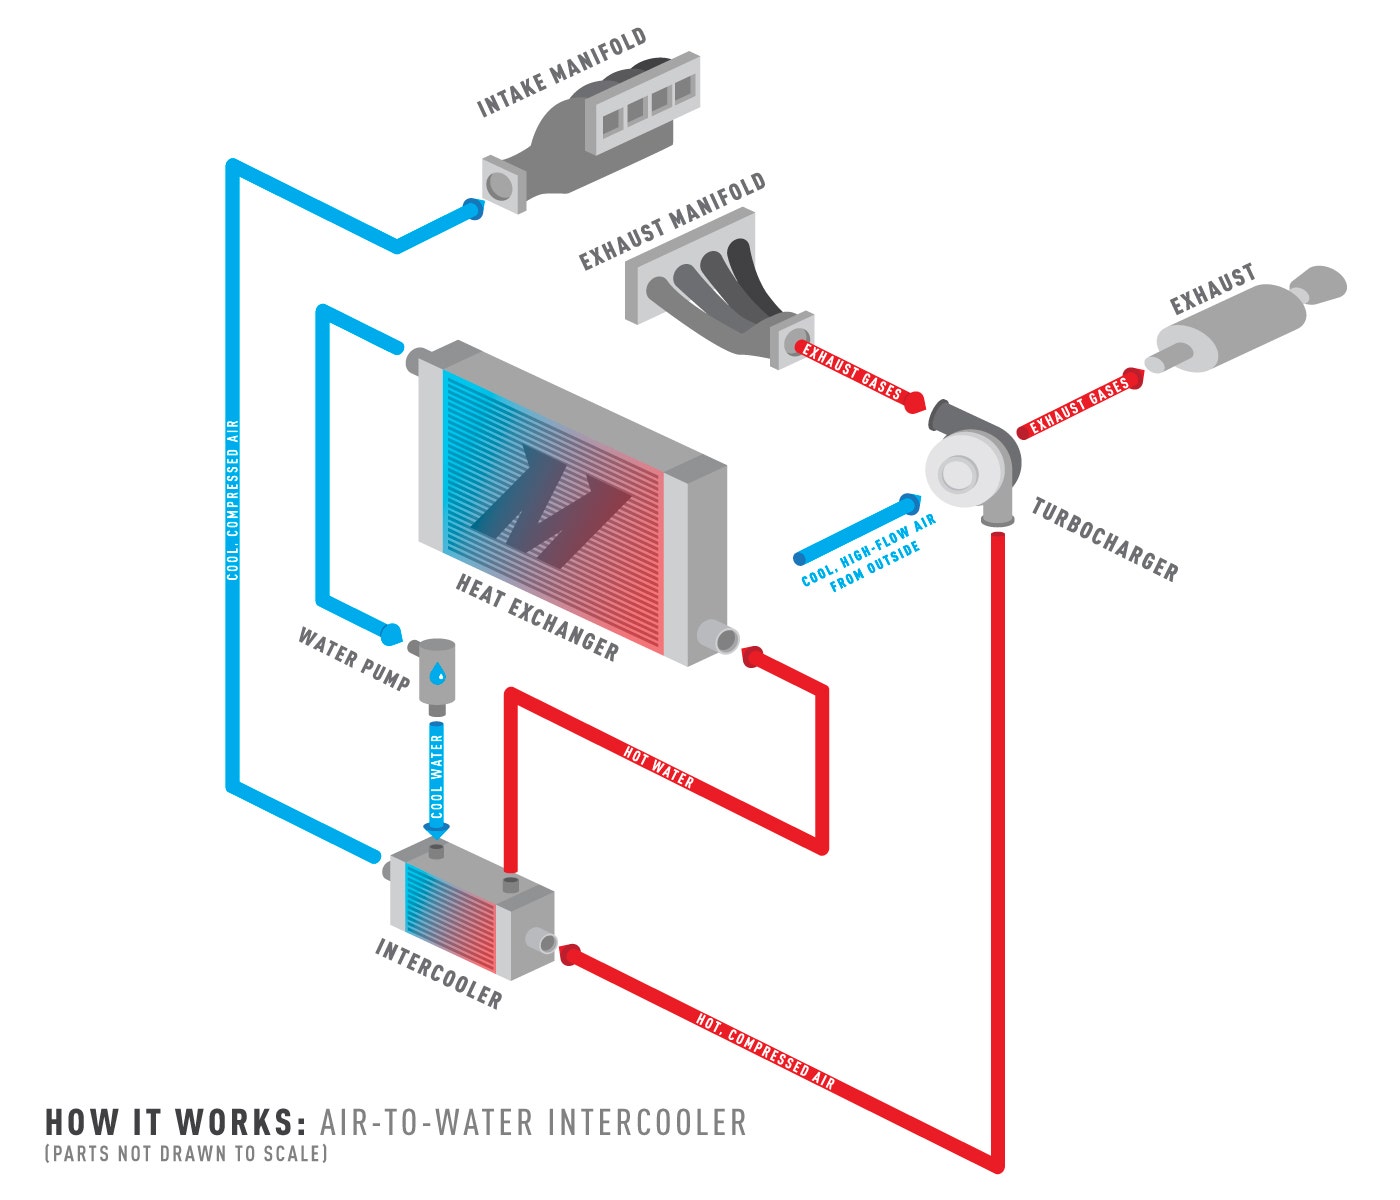
One of the main reasons the M3 is on another level is the S55's ability to keep its cool, especially when it comes to the intercooling system. BMW equipped the F8X generation of the M3 and M4 with a state-of-the-art air-to-water intercooling system for a more efficient means of keeping the charged air cool, but before we dive into our plans for besting the F80's heat exchanger, let's take a look at what an air-to-water system even is.
The Cool Factor

The process of air-to-liquid intercooling has been around for some time now, but it wasn't until recently that we started seeing this method on mass-produced vehicles. It was originally for super high horsepower engines, however, its advantages have trickled down to cars that we now see on the road every day.
The process of air-to-liquid intercooling has been around for some time now, but it wasn't until recently that we started seeing this method on mass-produced vehicles. It was originally for super high horsepower engines, however, its advantages have trickled down to cars that we now see on the road every day.
The main purpose behind this method of intercooling is
efficiency. As the second law of thermodynamics states, heat naturally flows
from a hotter object to a colder one, which is where the fins come into play on
a typical intercooler. The heat being carried through the tubes of an
air-to-air intercooler transfers to the fins, which is whisked away by the
stream of ambient air running through the intercooler.
When it comes to air-to-water intercooling, water has a greater thermal conductivity than air. Simply put, the water that makes up at least half of the coolant flowing through the system can more effectively transition the heat from the intercooler. Since water acts as an improved vessel for heat, the size of the intercooler now only has to be a fraction of the size to provide equal, if not better, heat transfer than a traditional air-to-air unit.
In addition to the improved heat conductivity, the intercooler does not require a direct flow of fresh air and can be placed just about anywhere in the engine bay. Ideally, the intercooler in an A2W system is mounted as close to the intake manifold as possible (or even in the manifold) in order to reduce the volume between the turbo and intake valves. This means less turbo lag and more responsive acceleration.
Nothing is perfect, however, and there are inevitably some
drawbacks when it comes to cooling charged air with water. The most glaring is
the complexity of adding an additional cooling system, which can get a little
cramped (I'm looking at you Infiniti). An air-to-water setup still relies on
airflow to exchange heat. While the water pump does keep the coolant churning
through the system, it can still be prone to heat soak under extended heavy
load or low speeds and idle.
Even with the added complexity of the system, the pros outweigh the cons, especially when it comes to adding more to the S55-powered M3. While BMW combed through the F80 with excruciating detail, we still found that there was room to improve, starting with the heat exchanger.
Team Captain
Air-to-water intercooling is much more of a team effort. In traditional air-to-air intercooling, the intercooler is the star of the show. Sure the piping plays a role, but the intercooler is the one-stop heat dissipation shop. When it comes to air-to-water intercooling, the heat exchanger picks up half, if not more, of the cooling duties. Before we get into our improvements, let's take a look at the stock unit.

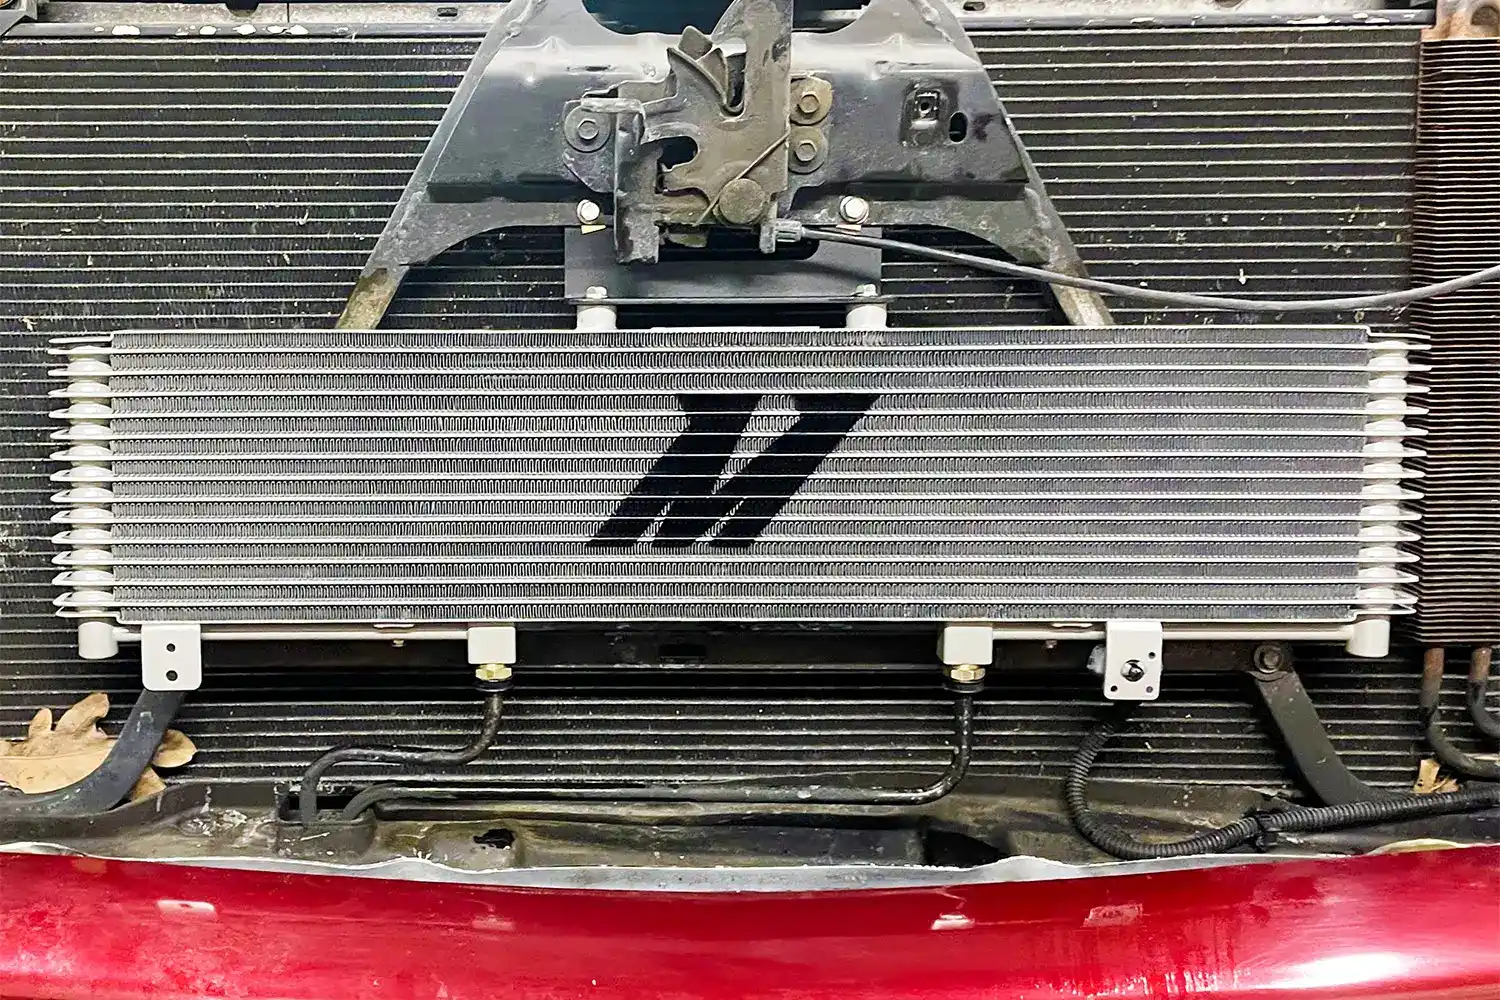
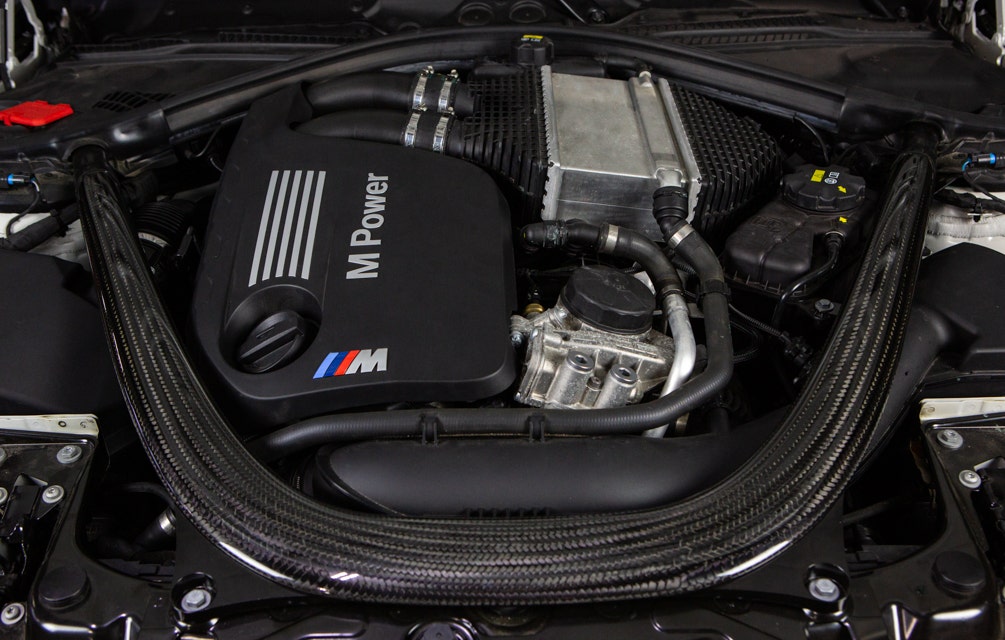
From a cursory glance, things already look good from the factory. BMW knows the importance of keeping the charged air cool, so they mounted the heat exchanger front and center in the cooling stack. This means that the intercooling system has first dibs on the fresh air hitting the front of the car. So far, so good.

The stock heat exchanger is fairly large, measuring almost the same size as the radiator itself and only cutting short for the benefit of the DCT-equipped models. When it comes to exchanging heat, the more surface area the better. The stock heat exchanger core has plenty of that, measuring in at 688in^2. However, with only 34 mm of thickness, there's still some room to grow.

Once our engineer, Jason, extracted the stock unit from our M3, he noticed some more marks against the stock design, namely the end tanks. Plastic is a great option for the mass production of heat exchanger units given the cost. The trade off, however, is the potential sacrifice of longevity and durability. The downside to having first dibs on the fresh air is that this unit is now exposed road debris. That combined with the constant cycles between hot and cold could lead to cracks, leaks, or worse, like losing the inlet/outlet ports molded into the end tanks.

With a close examination of the core design, it became clear that we had our work cut out for us. BMW already packed oodles of fins into their design thanks to the tight fin pitch. They also incorporated louvers into their fins for a more effective use of the core. Essentially, the fins are serrated in such a way that it forces the fresh air to pass through diagonally, giving this relatively thin core the heat dissipation properties of a core with a few extra millimeters in the width department.
The Plan
After completing an audit of the stock heat exchanger unit, Jason jumped straight into planning his improvements. Typically, this is the part of our development where we showcase some gratuitous welding photos as we put together a fitment prototype, but this time around, Jason was able to draw some inspiration from a former project. During the development of our C6 Corvette radiator, Jason designed a few different cores in order to fine tune the best cooling option for the giant V8. It turns out the core dimensions of our 42mm thick core are exactly what we're looking for to improve the cooling on the M3's system.

Size is the most apparent change when it comes to our design. The plan is to fill up the rest of the unused space on the front of the M3. If you scroll back up, you'll see that a good majority of the stock heat exchanger is tucked behind the crash beam, and only about a third of the core is in a direct line of the airflow. We're aiming to change that by filling out the rest of that area.

From Fabricated to Fabulous

There's much more to this heat exchanger than some extra bulk, which is easier to demonstrate with our actual production sample.

An obvious standout with our new heat exchanger design is the veil of steel mesh in front of the core. The drawback to having a front-row seat to airflow is that the heat exchanger is very susceptible to damage from rocks and other road debris. Our additional stone guard is in place to deflect any potential damage to the core and prevent sudden coolant leaks.


The core isn't the only component of our heat exchanger donning a new set of armor. We decided to forego plastic in favor of a full aluminum construction. We retained the dual pass layout, but now with a pair of much sturdier CNC-machined ports to keep the coolant safely flowing through the system.


Once the veil is lifted, we can take a closer examination of the star of the show, the core. As mentioned before, it's grown. Where the stock core cuts off for the M's with the DCT option, our design continues to the bottom of the cooling stack to maximize frontal fin surface area. To be exact, we added 150 mm to the height of the core for a 180% increase in external fin surface area. In addition, our heat exchanger has a core thickness of 42 mm, which contributes to the 60% bump in core volume.

The size and location of the heat exchanger is most of the equation, with the fin layout being the final piece. As covered in the last segment, the heat exchanger equipped on the M3 from the factory already featured a stout fin layout. Jason was still able to pack more fins into our new design by employing the use of a tighter fin density with the help of our own louvered fin design.

It's a safe bet that when BMW designs a component a certain way, they likely had a good reason for it. For example, cutting the stock heat exchanger short at the DCT cooler location. Yes, our design does block that cooler for those missing the 3rd pedal, but Jason wanted to make sure that the transmission temperatures stayed in line. The first step was an upgraded cooler design (coming soon), but to help the stock cooler, Jason incorporated a variable fin pitch design on the heat exchanger's core. The fins on the bottom 12 rows of the exchanger have a looser fin pitch to allow for better flow to the DCT cooler. This method is a means of balancing the airflow between the fleet of coolers on the front of the Bimmer without compromising performance in our design.

Sure, all these improvements sound impressive, but what do they equate to once the S55 starts cranking? Simply put, dropping coolant temperatures. The larger fin surface area coupled with tightly packed fins and a larger core volume are all attributes needed for better heat dissipation, so we put the combination of those to the test on our Dynapack system in tandem with the rest of our kit. Make sure to stay tuned to see how our heat exchanger performs with the rest of our upcoming products.
Already convinced? You're in luck, our Performance heat
exchanger is available now:
2015-2020 BMW F8X M3/M4 Performance Heat Exchanger

Thanks for Reading!
-Nick