Everyday Exploration - Oil Catch Can Kit, Part 4: Final Design
If you've ever started something new or made a momentous change in your life, you've heard some version of the old cliché, "Life isn't about the destination, it's about the journey." While I agree with that sentiment, anybody who's conquered a major challenge can tell you that, sometimes, the destination is the best part. There's nothing quite like the feeling of accomplishment you get from seeing something through to the end, no matter how long the journey is between.

When we last talked about our 2018+ Jeep Wrangler JL 2.0T catch can, we were just beginning our exploration and journey to a successful product. Our proof-of-concept kit had collected a substantial amount of blow-by on the CCV side but triggered a check engine light in the process. A quick look into the engine's computer revealed that the catch can was causing too much restriction in the CCV system and the sensitive crankcase pressure sensor was having none of it. Over the next 10,000 miles, we would build 10 more iterations of our CCV kit and spend countless hours striking a balance between flow and function.
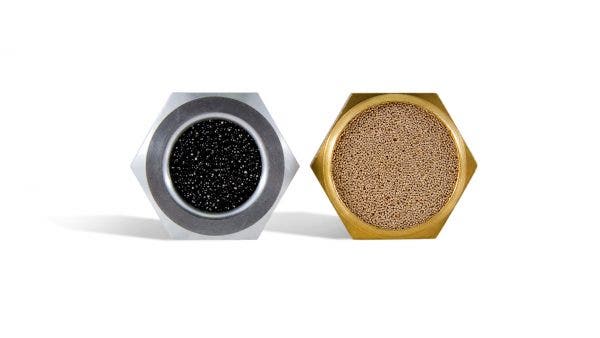
The first step in this process was to determine if the issue was due to our lines or the catch can itself. To do that, we began simplifying the system and changing parts one by one. When we developed our high-flow catch can for diesel applications, we learned that the most restrictive part of our compact catch can is the bronze filter on the can outlet. This filter normally catches larger pieces of carbon and helps further condense vapor in the can. If removing it solved the CEL, we would need to come up with a high-flow alternative to serve the same purpose. Our first test entailed removing the filter, reinstalling the can in its original position on the firewall, and driving 1,000 miles. The next morning, however, we already had our answer.
As the soft, warm glow of the CEL illuminated the gauge cluster of our 2.0L JL, we headed back to our engineering facility to continue troubleshooting. With the bronze filter eliminated as the sole culprit of our issues, we began to suspect our lines and the next most restrictive part of our can: the lid. To help determine if the volume of our lines and can was simply too much for the CCV system to fill, we ran a loop of 1/2" hose from the valve cover to the sensor. This loop had the same volume as our entire catch can system but flowed better. If the check engine light was not triggered, we knew we could increase the size of our lines and lid to compensate for the reduced flow through the can.
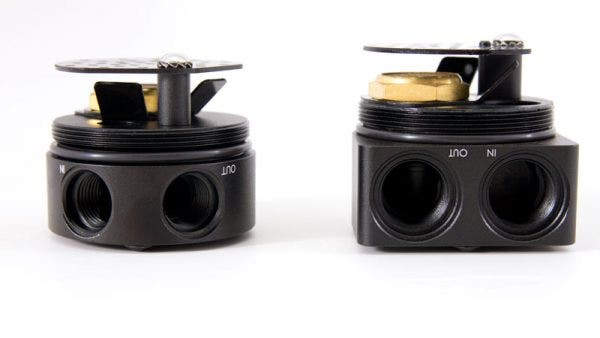
We ran the JL with the loop of hose for 1,000 miles before we were confident enough to say that increasing flow through the system should be our priority. To achieve that increase in flow, we decided to hedge our bets. We reinstalled the bronze filter but swapped our standard compact catch can lid for a lid with larger fittings. Those larger fittings also meant 1/8" larger lines for even more flow. Although our hose loop test showed that the length of the lines alone was not an issue, we wanted to offset the additional restriction of the catch can even more by making the lines as short as possible. This meant temporarily mounting the catch can to the engine until we could find a more suitable location.
Another 1,000 miles without a CEL led us to find a more permanent location for the catch can. We prefer not to mount the catch can on the engine for several reasons. For one, the movement of the engine makes it easier for condensed vapor to slosh up to the outlet port and get sucked back into the engine. Mounting the can on the engine also means that all the weight of the can is being whipped around with the engine's movement and that puts a lot of stress on the bracket. We needed to mount the can somewhere solid and easy to service. The cramped engine bay left us no choice but to move the can back towards the firewall. We mounted the can on the driver-side fender and hoped that our larger lines and lid would be enough to keep the CEL away.
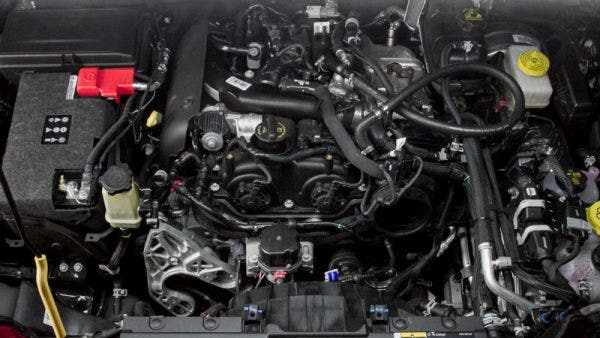
Even with the larger lines and lid, we still couldn't appease the pressure sensor. The lines needed to be shorter, and that meant mounting the can to the engine. Luckily, we had a plan to eliminate the issues we talked about before. About halfway down the engine is a pump that provides vacuum to the brake booster when the start-stop system is active. This pump is mounted on a solid cast part of the engine and its low position means that it's close to the engine's center of rotation, where the least amount of force and movement is generated as the engine revs. If we mount our can here, and keep it tucked close to the mounting point, it will prevent the issues associated with a higher engine mount.

Our engineer, Ye, designed a sturdy, 3mm-thick steel bracket that wrapped around and slid under the vacuum pump. The pump on top of the bracket and the mount below will provide support on both sides, and the compact design will keep cantilever forces on the can low. Another road test would reveal if this new location was enough to rid us of the CEL for good.
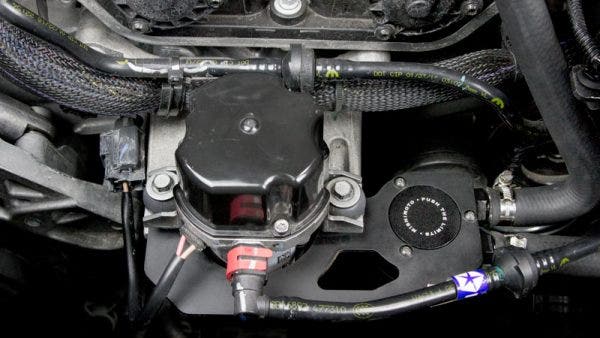
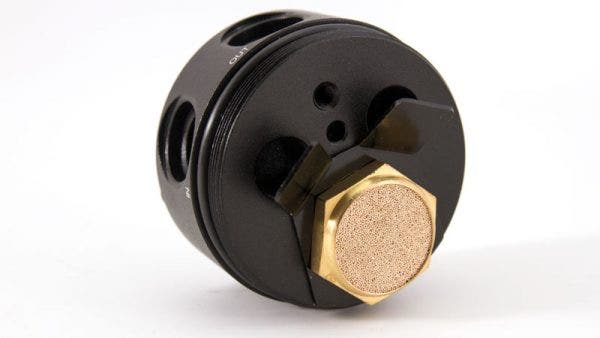
The one convenient part of this process is that the CEL comes on within a couple start cycles, so we know right away if our design will trigger the light. The next day after installing our new bracket, we knew we had more work to do. With the can mounted on the engine, the lines were as short as possible, so our last resort for allowing more flow was to return to the bronze filter in the can lid. Our idea was to use the foam filter media from our high-flow catch can to replace the bronze filter element. To do this, our fabricator turned a new filter holder and pressed in the foam filter. We installed the new filter in our already oversized catch can lid, crossed our fingers, and sent the JL out for another test.
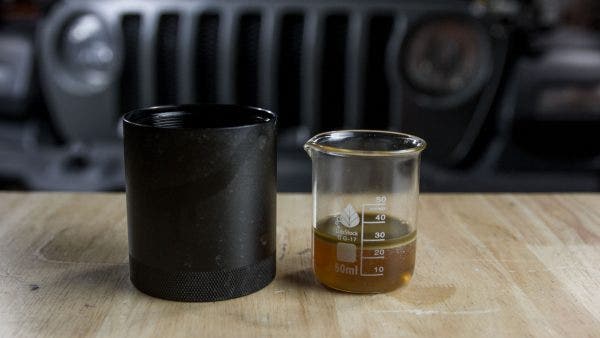
After 11 different iterations and more than 10,000 miles of testing through every weather condition imaginable, we finally had a functioning catch can kit for the 2018+ Jeep Wrangler JL 2.0L. We ran the final iteration of the kit for 2,000 miles before letting ourselves believe it. But even though we had tackled the CEL issue, we weren't done yet. With all the extra flow, we needed to make sure the blow-by was still condensing in the can. After the first 1,000 miles with the foam filter installed, we pulled the bottom of the can.
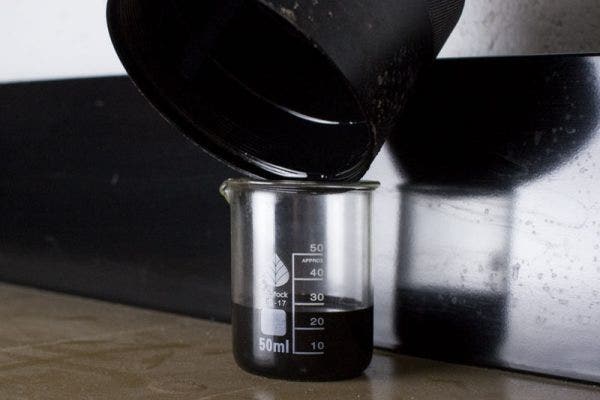
To our surprise, the small portion of oil that we collected in the can at 1,000 miles had grown tremendously by 10,000 miles. Pouring the contents of the can into a graduated beaker revealed 25 ml of black oil in the can. That amount of oil is enough to thoroughly coat all 16 valves of the Hurricane engine in no time, and that's just 1/13th of the average driver's yearly commute. Because the can isn't in the most easy-to-access location, we wanted to make it easier to drain or extend the service interval for emptying the can. The risk of a leak with our drain kit was far too high given the sensitivity of the CCV pressure sensor, so we opted for the next best thing. We replaced our standard 3oz catch can bottom with our 7.5oz bottom. This change should triple the time allowed between changes and one more CEL-free road test solidified our design.
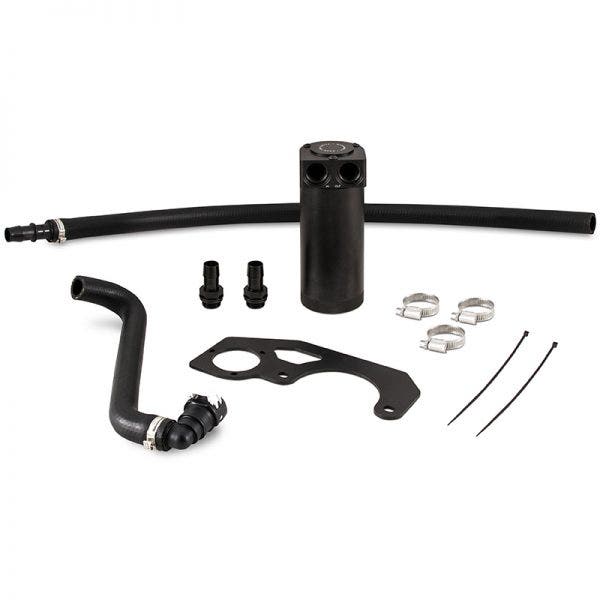
With the final road test complete, we're happy to say that one of our most exhausting projects to date is coming to an end. We've put in the work and now it's our time to bask in the feeling of accomplishment (even if only for a few minutes before our next complex project). For you, however, the fun is just beginning. This catch can kit is now on discounted pre-sale. Now is your chance to put countless hours of engineering to work and protect your 2.0T JL through your everyday exploration.