Take in the World - Intake R&D Part 3: Design to Production
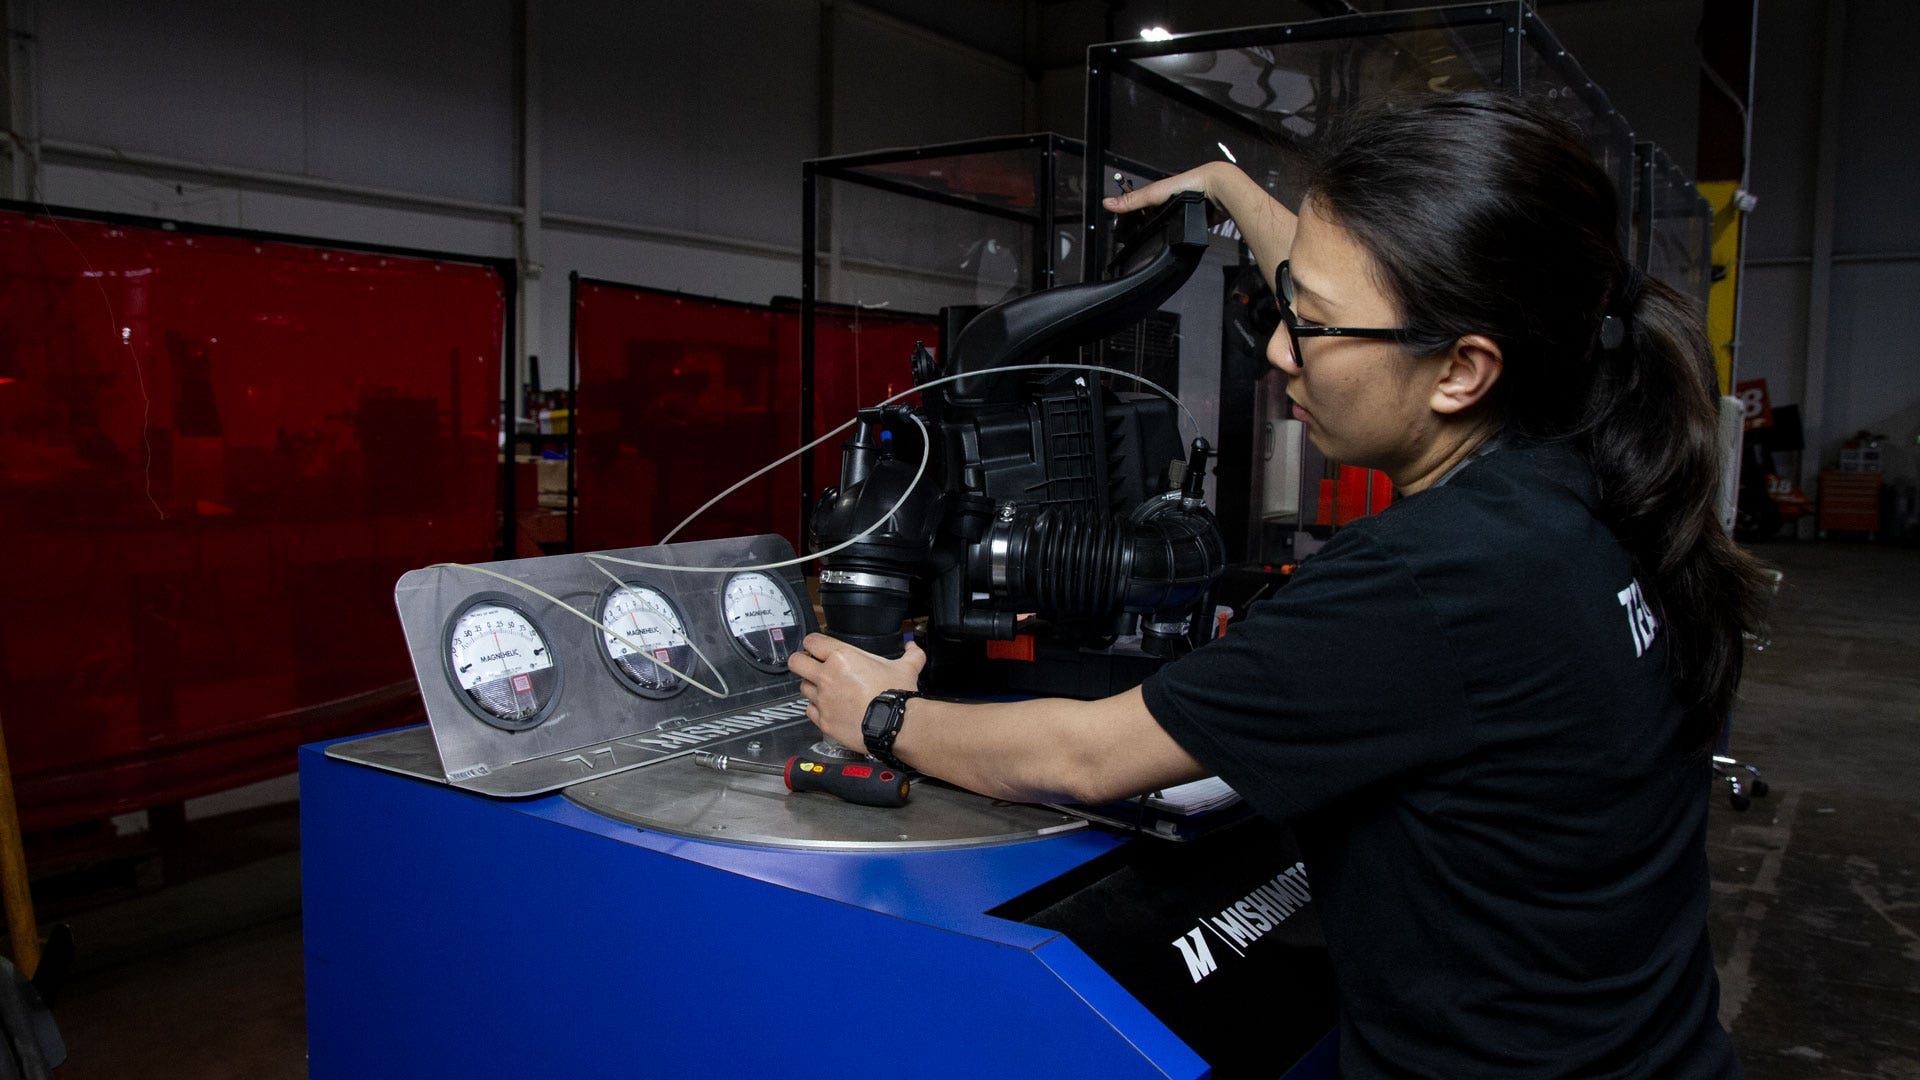
The dyno roller whirred away as we ran the Ranger through its warmup runs. We watched as the line on the graph climbed and fell with the sound of the Ranger's 2.3L EcoBoost. With the engine up to operating temp and the dyno computer logging, we started our power runs.
When we last saw the 2019+ Ford Ranger 2.3L EcoBoost intake, we performed our 3D scans and flow-benched the stock intake. In this post, we'll take leaps and bounds towards a finished product.
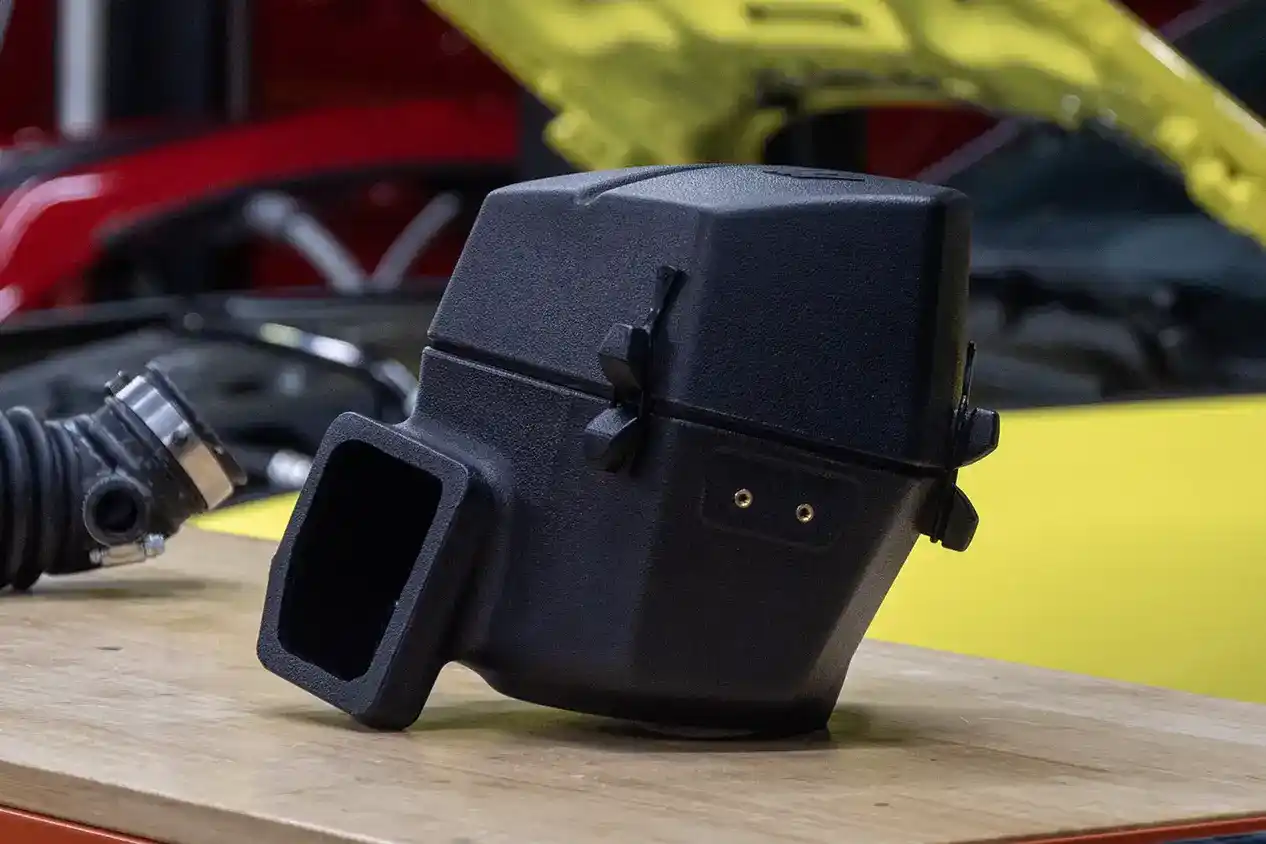
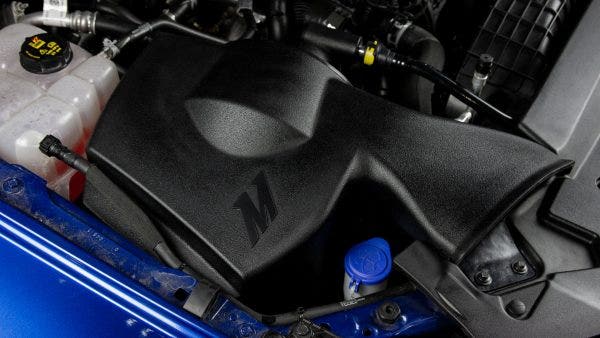
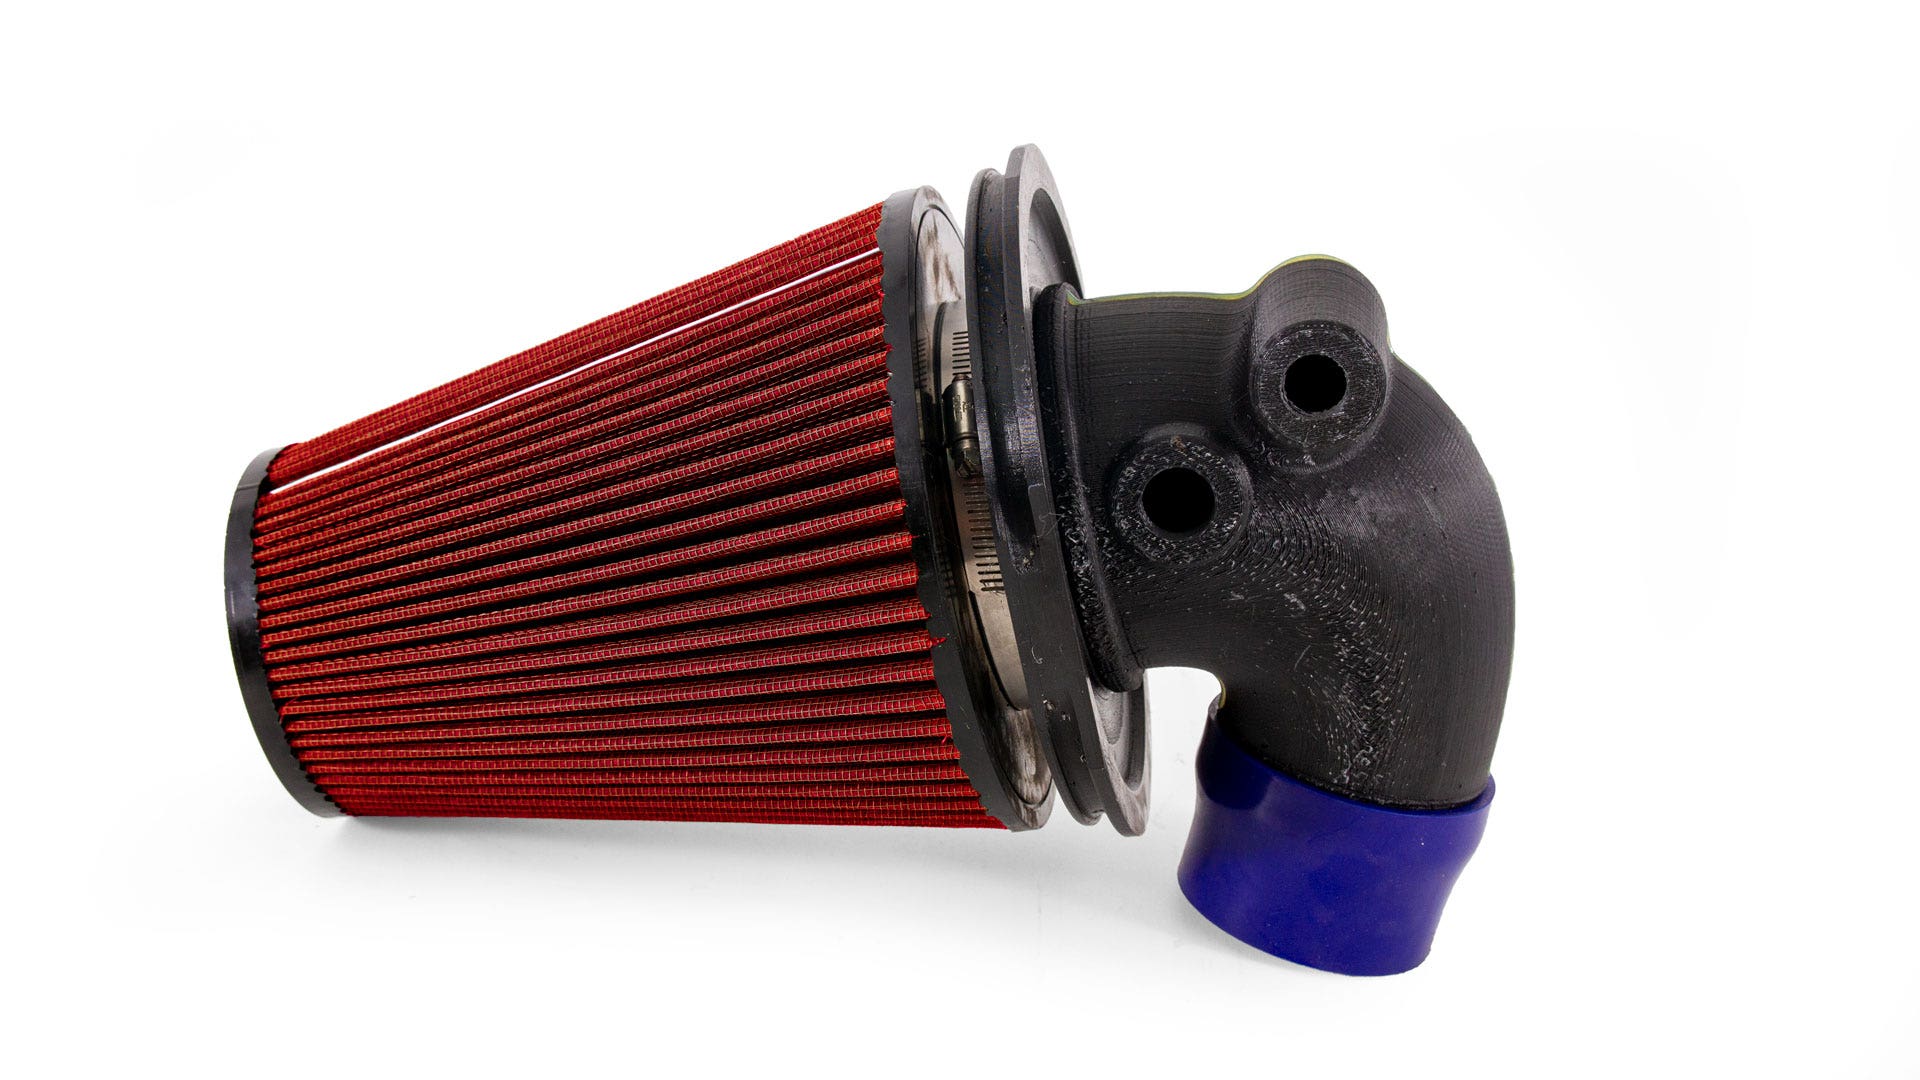
From our measurements and flow testing, we determined what we would keep from the stock intake and what we would improve. We want to ensure the intake air stayed as cold as possible, so we want to keep the scoop that pulls in outside air from between the hood and the grille. The rest of the airbox, however, will be completely revamped as a rotational-molded box with enough room for a custom high-flow filter.
For the intake tubes, we can only upgrade the first due to emissions restrictions. However, by replacing the first corrugated tube, we'll improve flow drastically. Like our airbox, the first intake tube will be rotomolded plastic to give the air a smooth path into the turbo. As we mentioned in our last post, the corrugation of the first tube isolates the airbox from engine movement. Because our tube will be rigid, we need a way to allow the engine to move without damaging the intake. Instead of adding another coupler, Ye built the flexibility around the airbox and filter. A flexible collar will hold the filter and tube in place, sealing the airbox and allowing the intake to flex. Now that we had a plan, Ye could create a 3D model and begin the prototyping process.
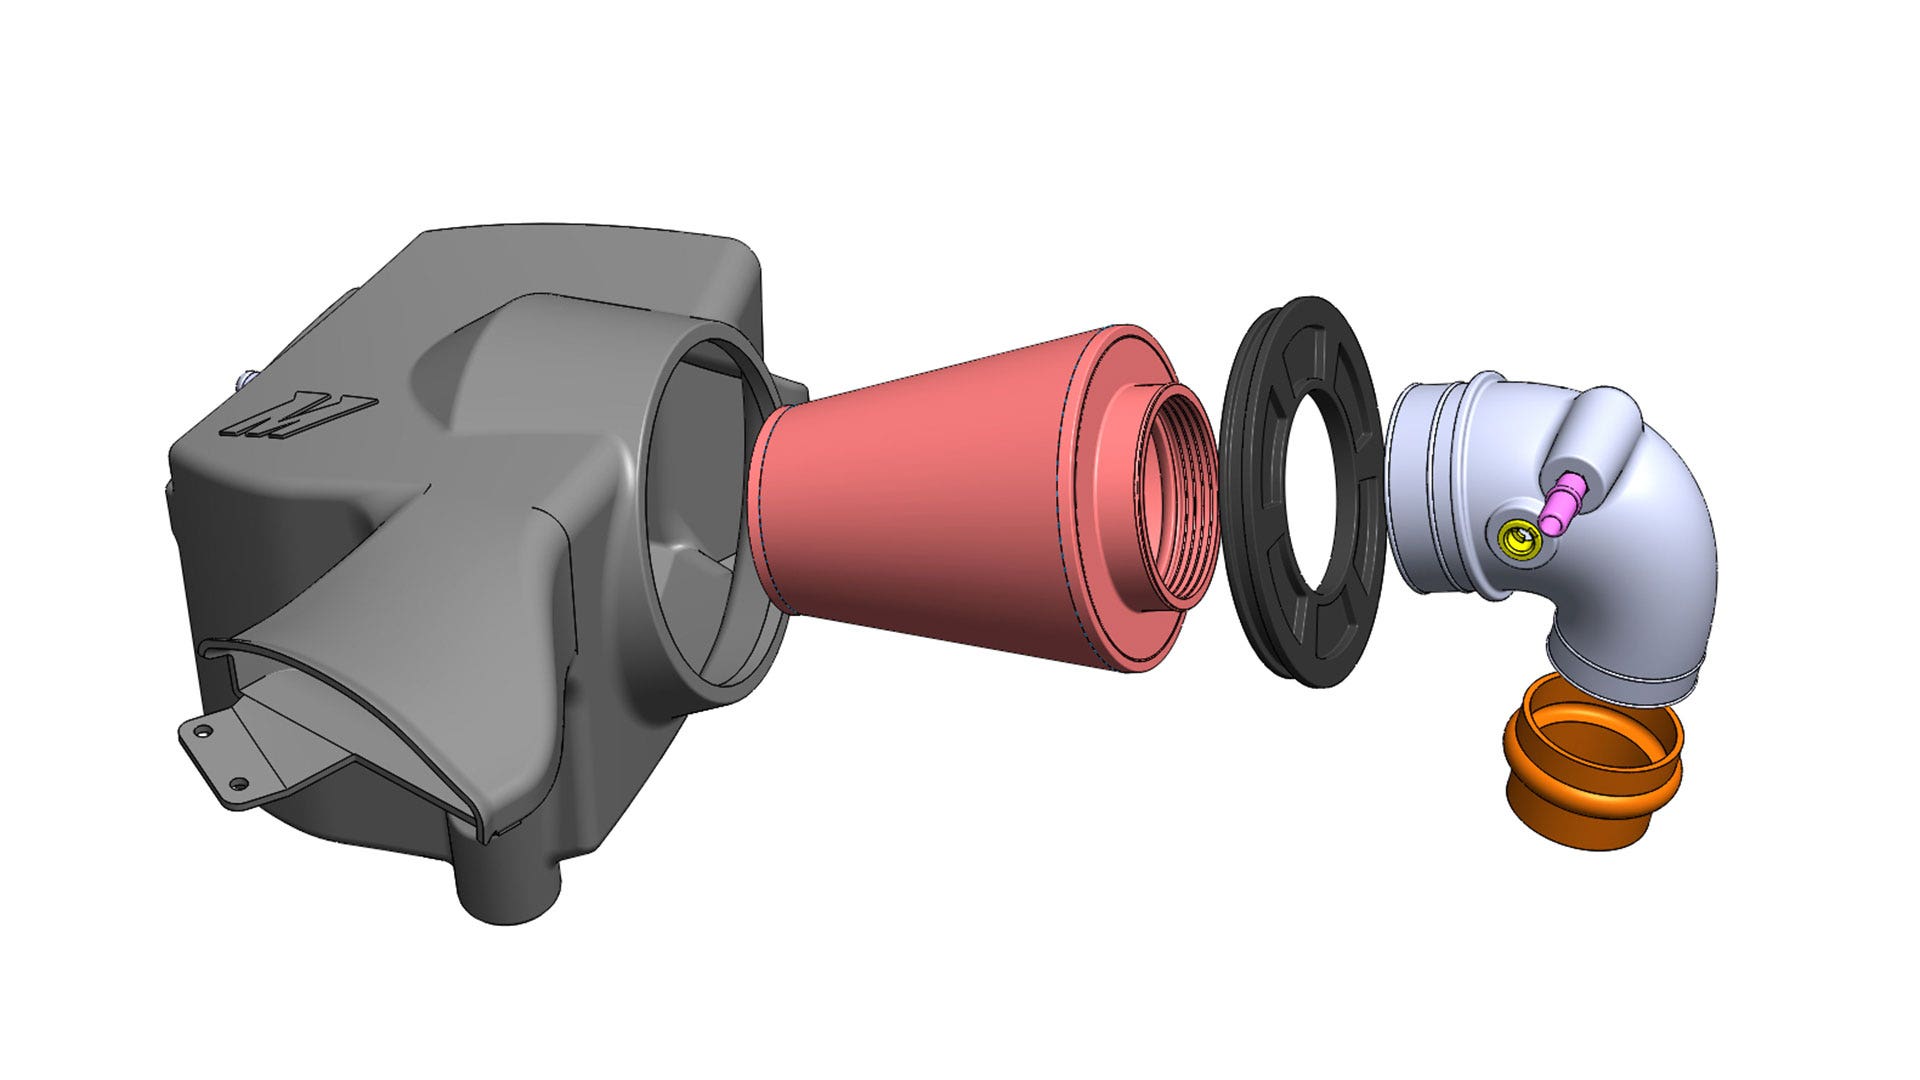
The model allowed our 3D-printing guru, Josh, to begin printing components. The airbox is larger than our 3D printers can print in one pass, so Josh broke it up into multiple parts, which we'll stitch together later. We also 3D printed the intake tube and machined the PCV port and temperature sensor fitting. To make the coupler and the collar for the filter, we followed a similar process as we did for our JL Wrangler intake coupler. We created a rubber mold and filled it with liquid silicone. Once all of the components were complete, we combined them to create our prototype.
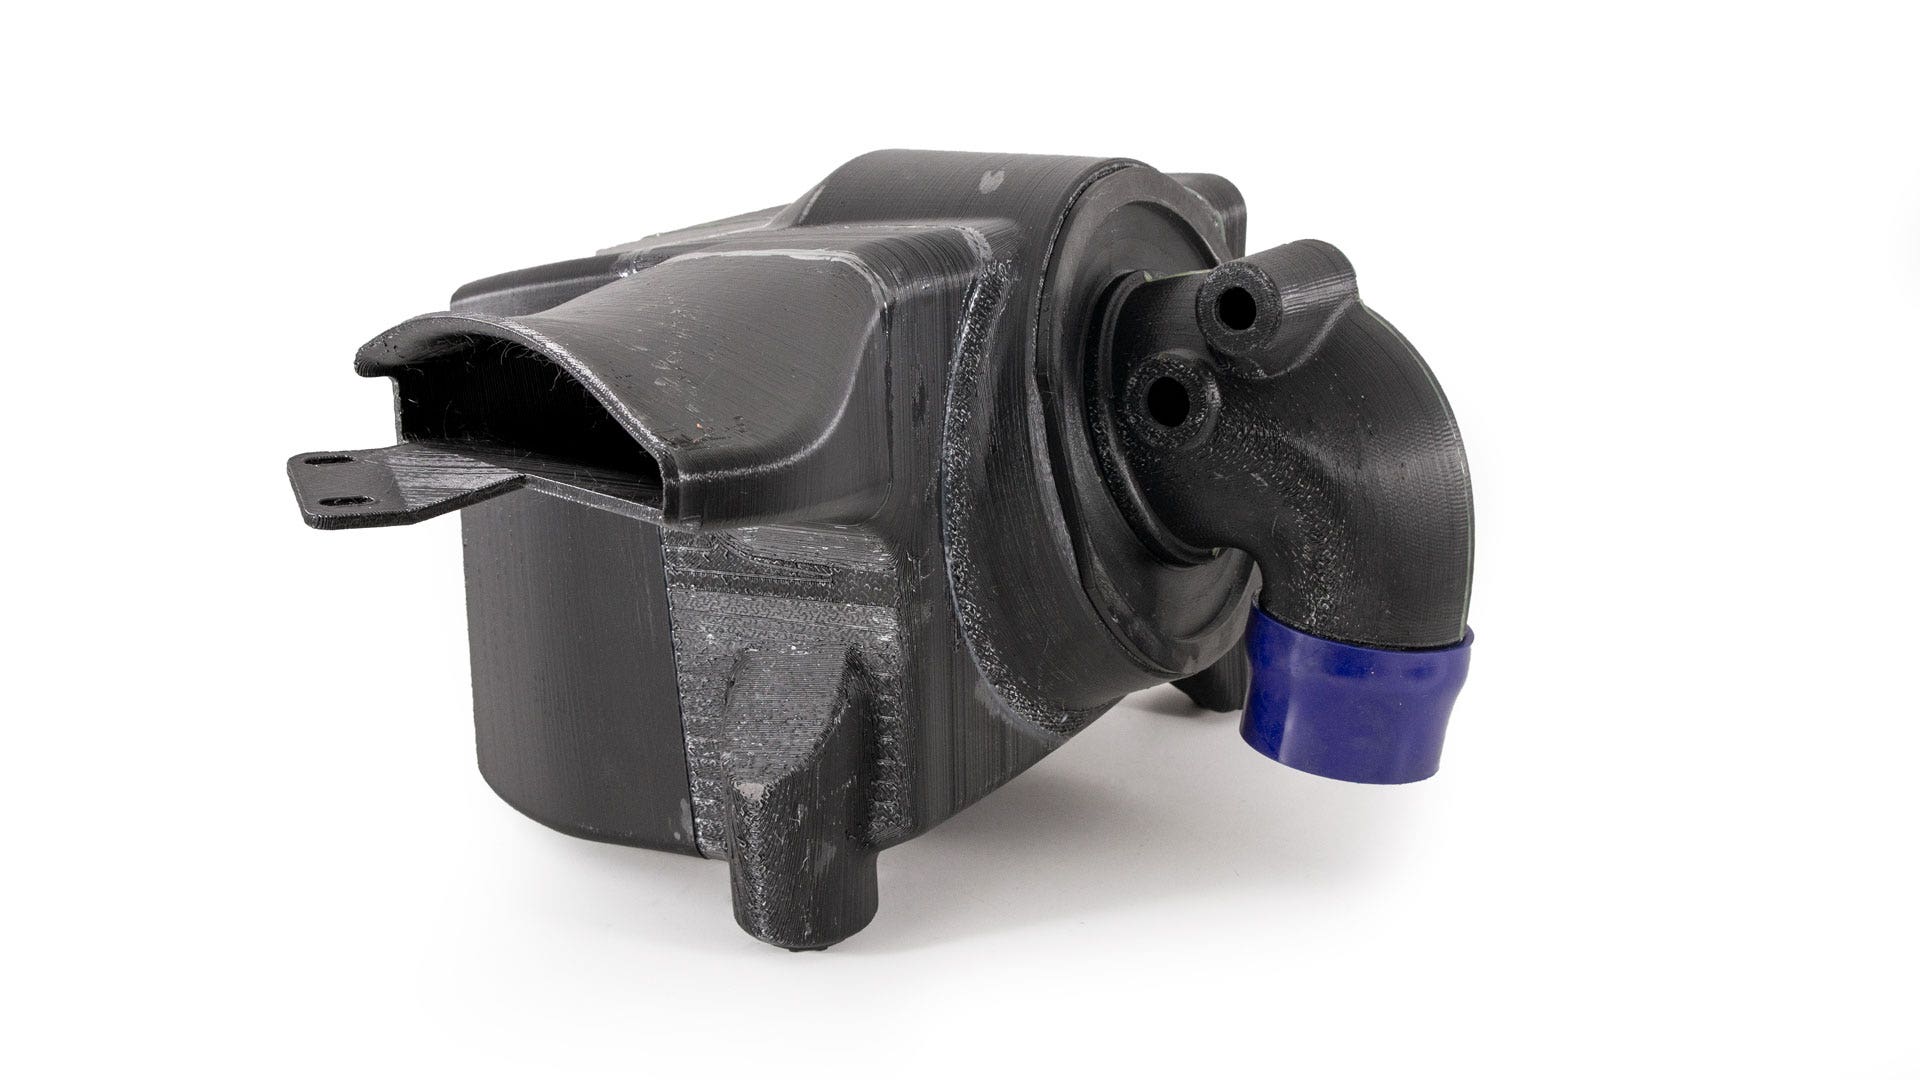
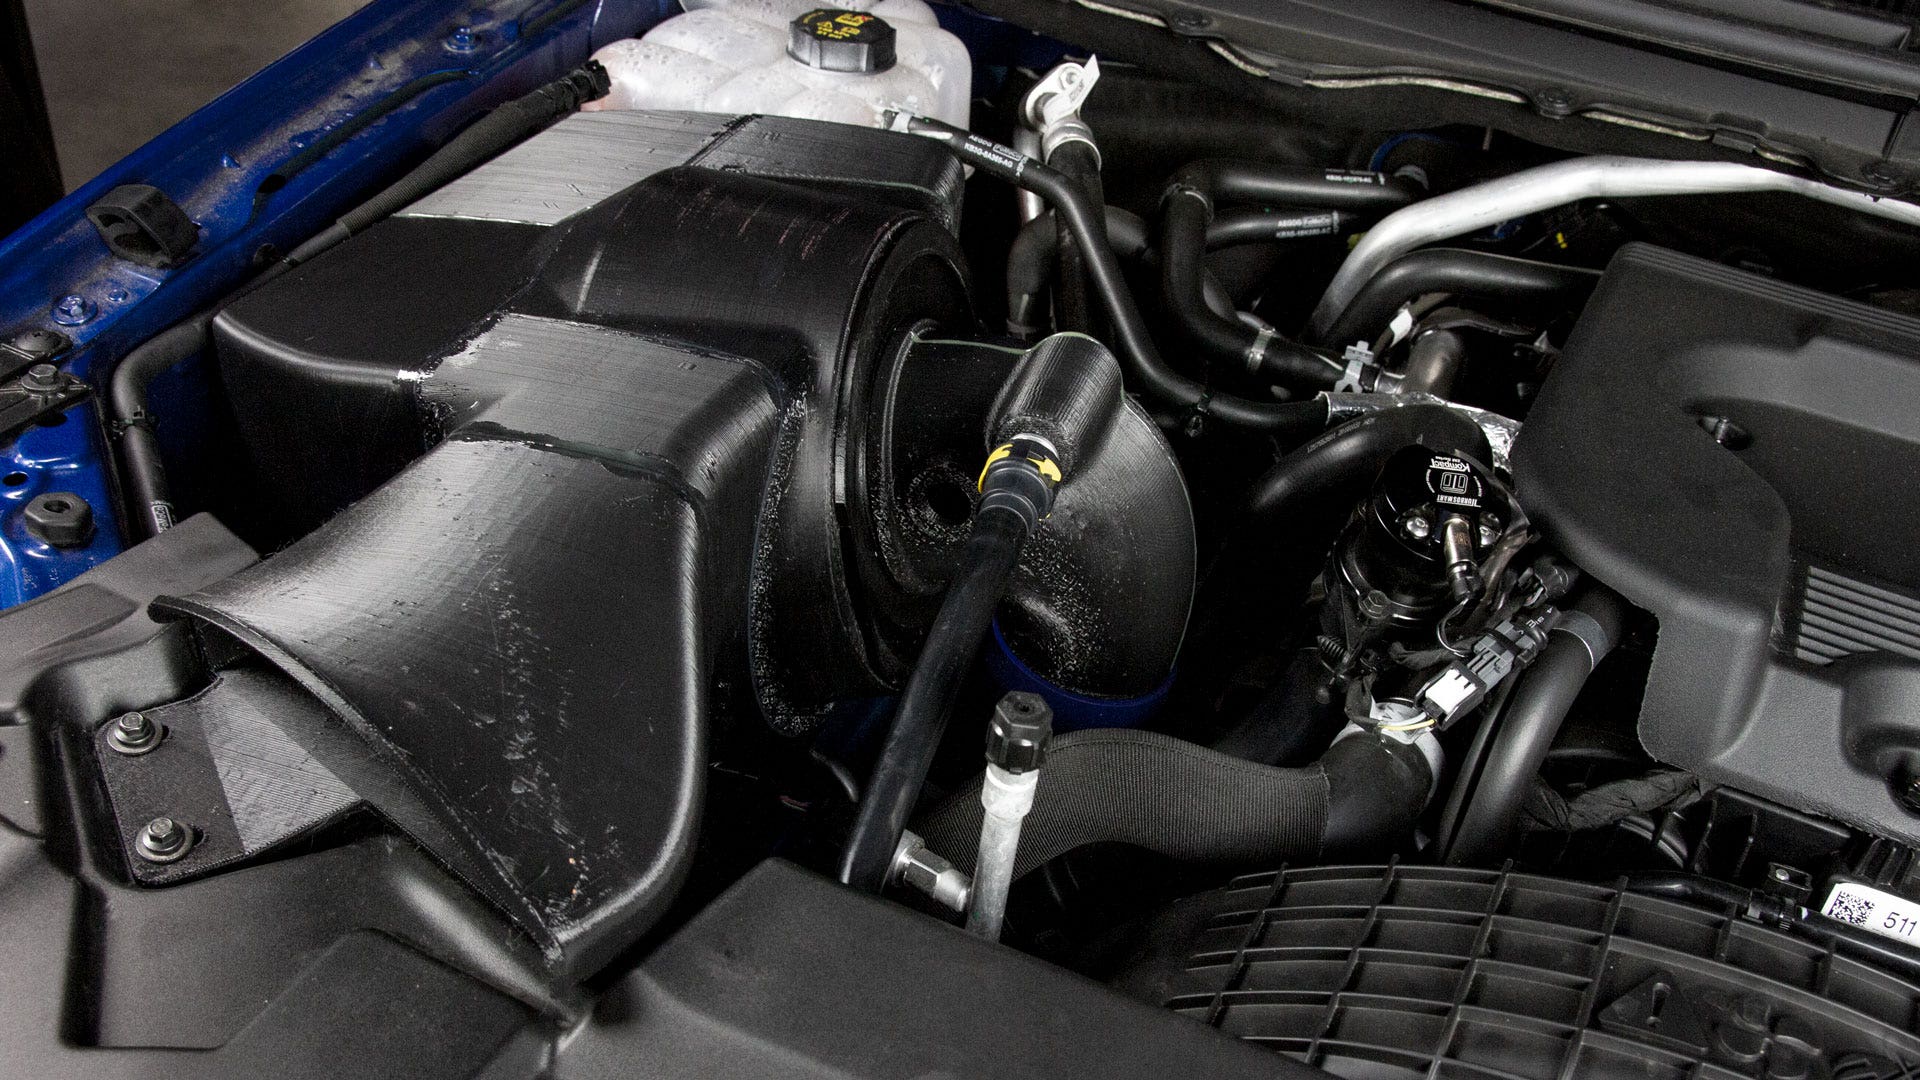
The first test of our prototype was to make sure it fits in the stock location. Ye quickly removed the stock intake and installed our prototype. Thanks to her precise measurements and Josh's adept 3D printing, the prototype installed effortlessly.

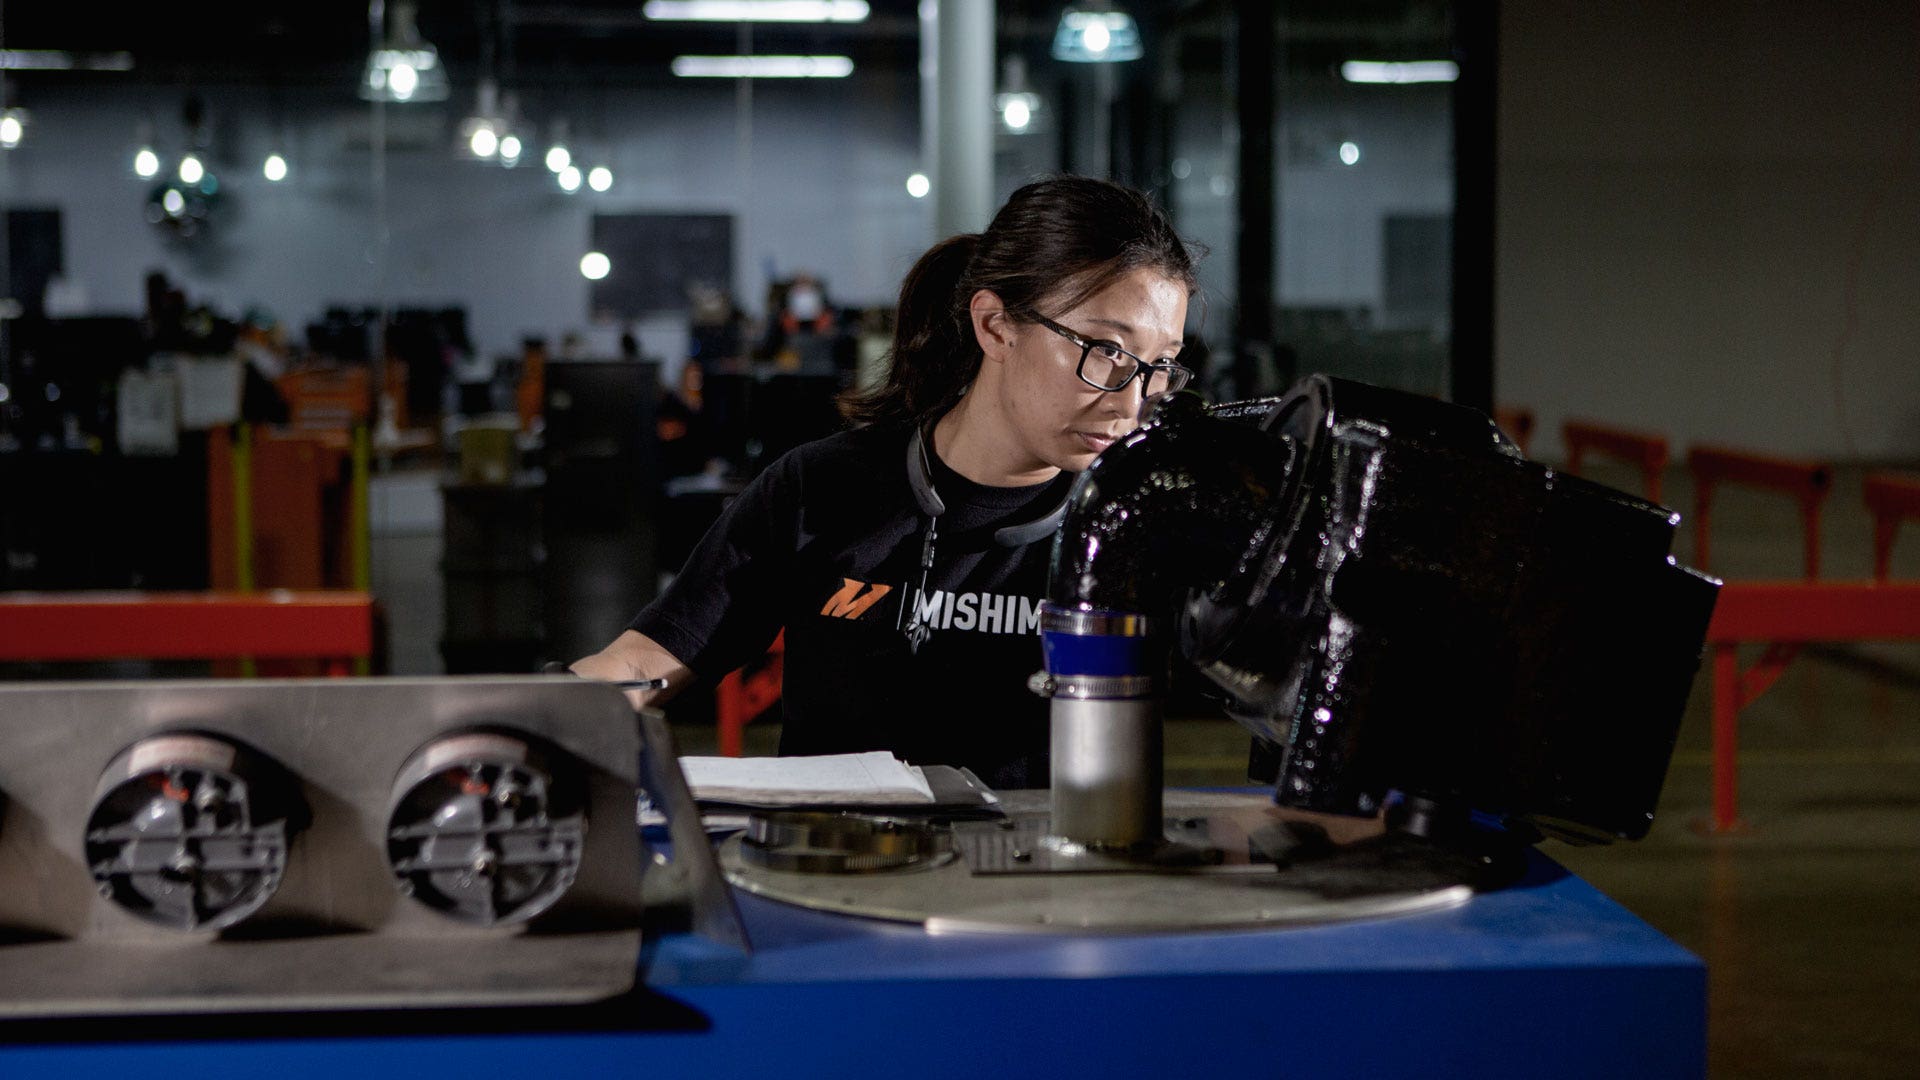
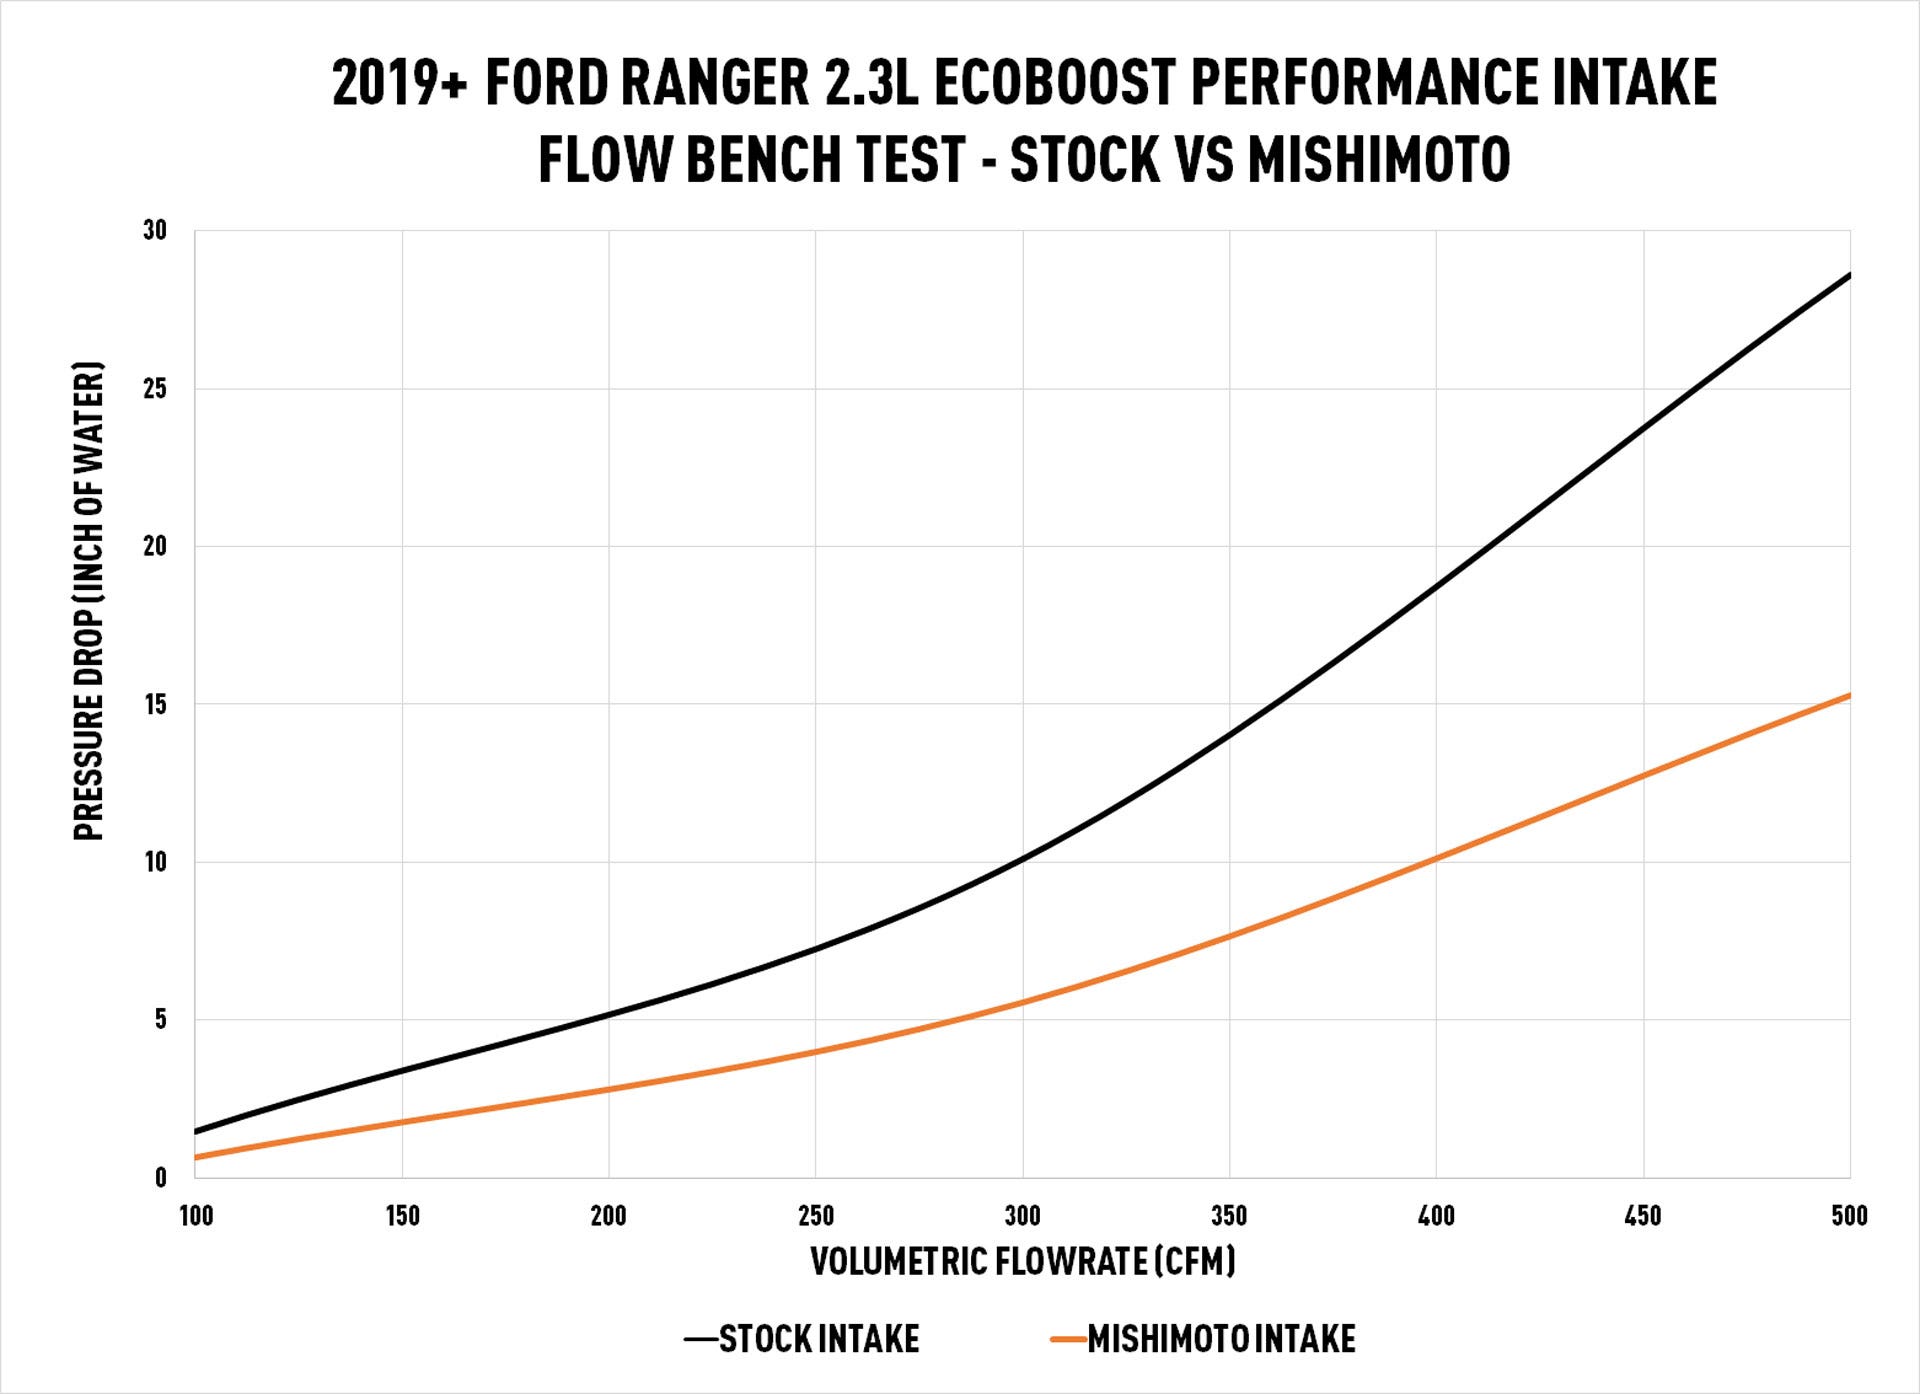
The next step in vetting our design is the flow bench test. We'll compare the flow of our airbox, filter, and tube to the stock intake to verify our system flows better. Before we can do that, however, we needed to prepare the 3D-printed prototype. In the past, we've found that 3D-printed parts flow significantly worse than our production parts due to the rough texture of the plastic. 3D prints are also not air-tight, so air passing through the material can skew testing results and sensor readings. To solve both issues, we covered our prototype in a resin designed to seal 3D prints. With the prototype sealed, we ran it on the flow bench.
When we compared the results, we were happy to see that our intake was almost 50% less restrictive than the stock intake. That massive increase in flow left us optimistic for the next and most exciting test: the dyno.
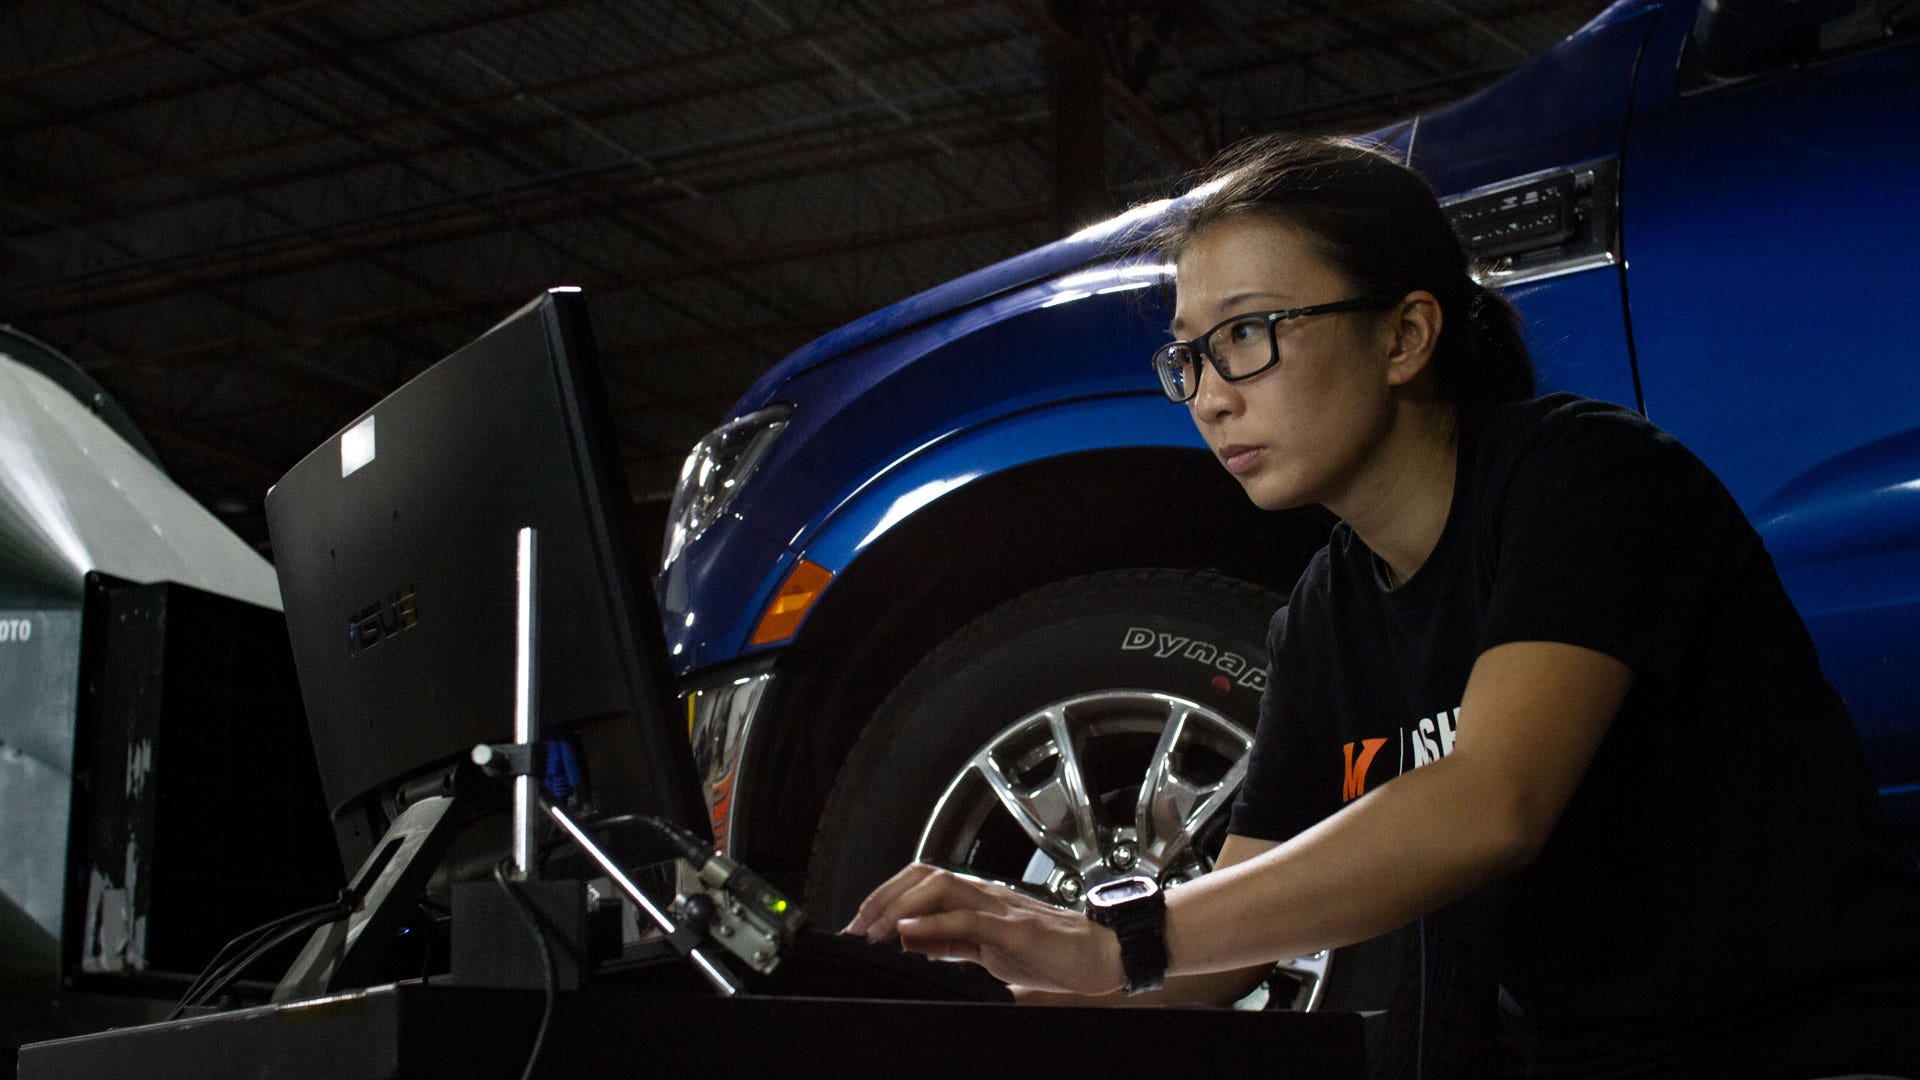
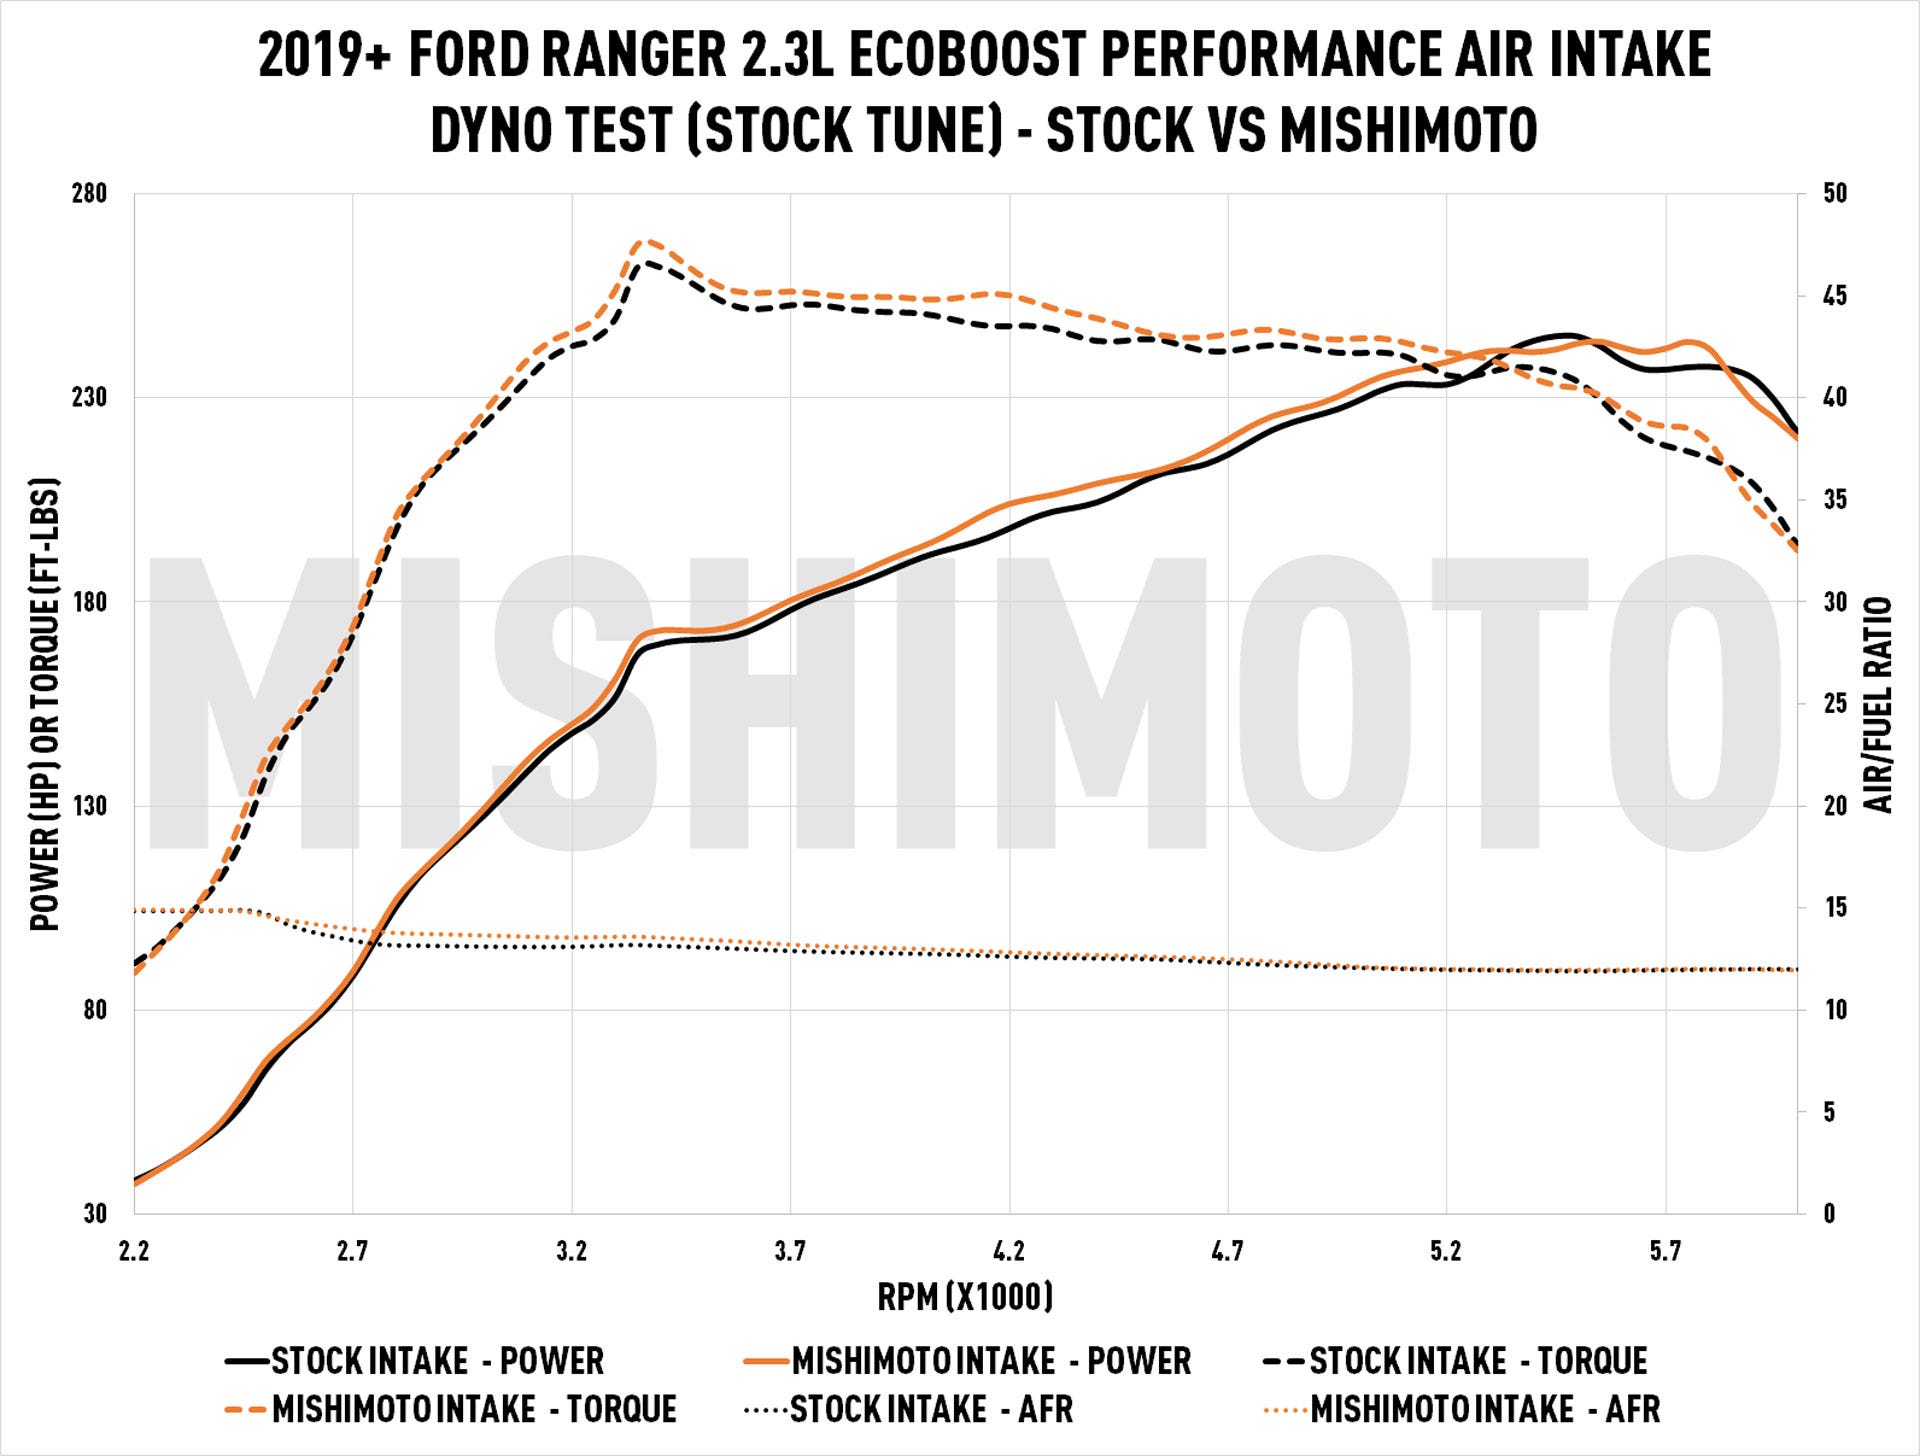
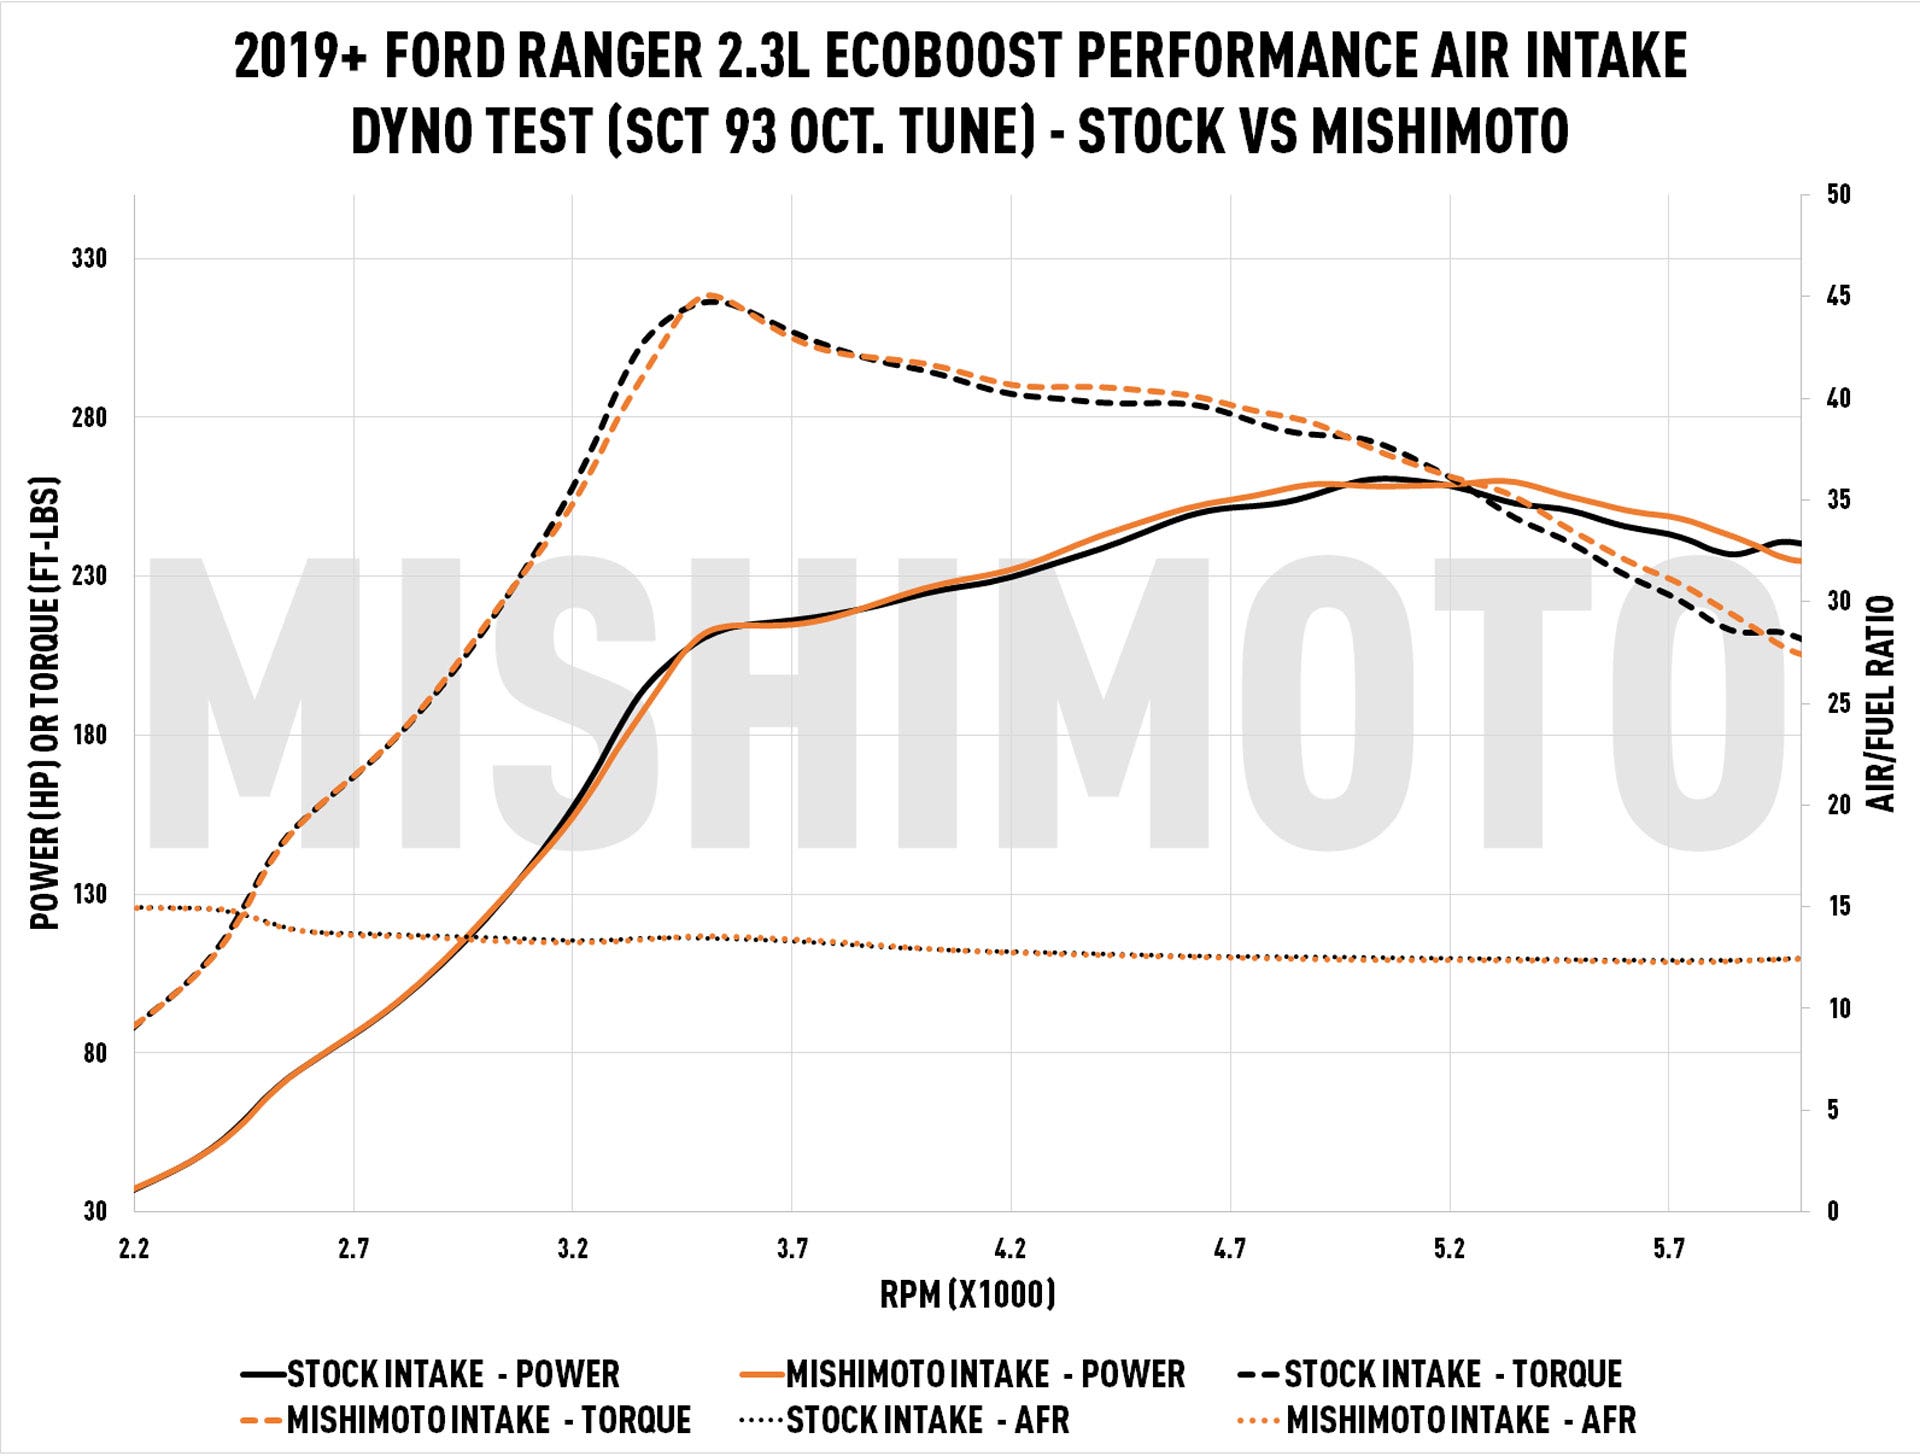
Ye reinstalled the prototype intake and loaded the Ranger onto our Dynojet. The dyno roller whirred away as we ran the Ranger through its warmup runs. We watched as the line on the graph climbed and fell with the sound of the Ranger's 2.3L EcoBoost. With the engine up to operating temp and the dyno computer logging, we started our power runs. Ye ran the Ranger through six power runs to make sure the truck's ECU had adapted to the new flow and to give us the most accurate numbers. After we had enough data on the stock ECU programming, we repeated the runs with an SCT 93 octane tune. We averaged the runs from each tune together and used the averaged values for our final dyno charts.
Our intake generated gains of 6.3 horsepower and 7.9 lb-ft of torque on the stock tune and 6.7 horsepower and 6.6 lb-ft of torque on the SCT tune. The reason the increases are lower on the SCT tune is likely due to other components in the engine becoming the bottleneck for performance. Nevertheless, with the SCT tune and our intake, the Ranger produced a massive 318 lb-ft of torque and 260 horsepower – plenty to make the lightweight Ranger get up and go.
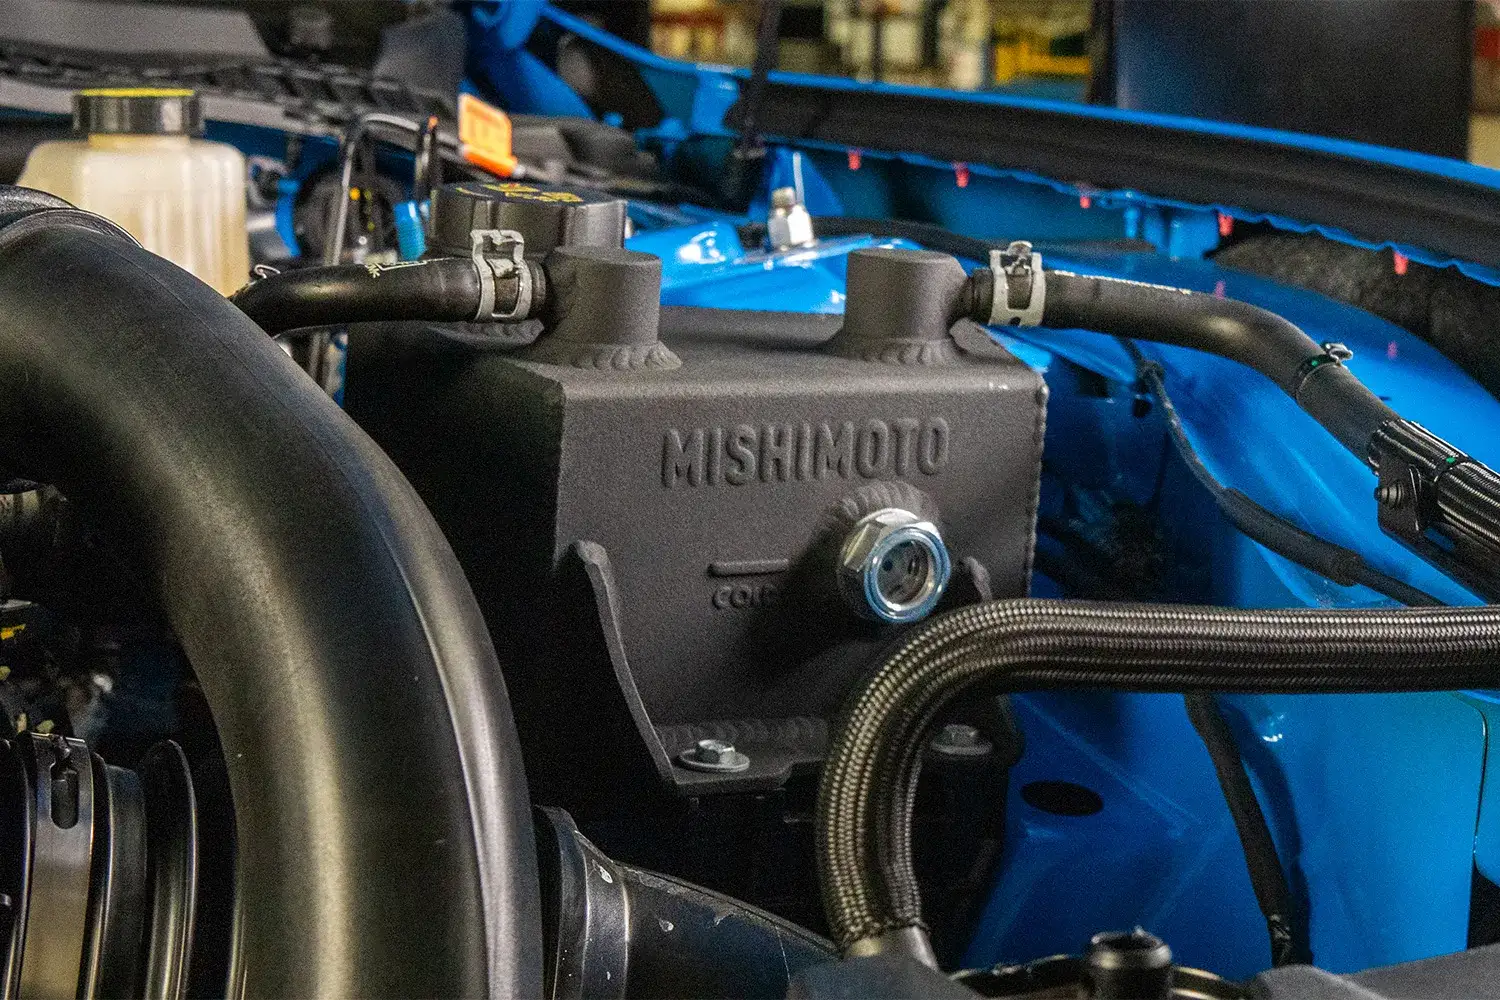
The dyno test proved that our intake was far superior to the stock intake, but we still weren't done testing. We've learned from our development of our 2.0T Jeep Wrangler intake that modern turbocharged engines can be temperamental about changes to the intake on the road. To make sure our upgraded system could keep up in the long term, we ran a long term road test. To protect our 3D-printed prototype from the heat of the engine on long drives, we wrapped it in our Mishimoto heat reflective tape. After several weeks of road testing, we were sure the ECU and the intake were getting along and could kick off production.

It wasn't long before we had a production sample in our shop and we could swap out the prototype. Our sample install went as smoothly as the prototype test fit and, with all of our testing complete, we're ready to launch the pre-sale for this intake. Now is your chance to get our 2019+ Ranger 2.3L Performance Air Intake at a discount and let your Ranger take in the world with you. For more details on the pre-sale, check out our website, and as always, let us know what you think!
Thanks for reading,
-Steve