Mishimoto 2015 Subaru WRX CVT Transmission Fluid Cooler, Part 2: Prototype 1 Development and Testing
Interested in purchasing our WRX transmission cooler? Check out our product page for more information!
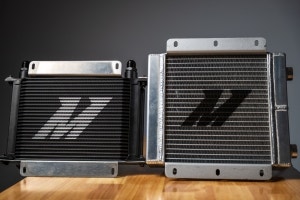
Mishimoto Subaru WRX CVT Transmission Cooler
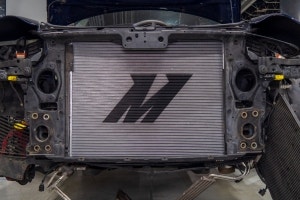
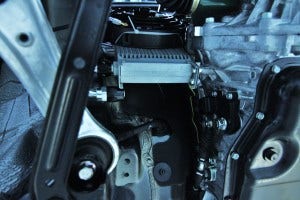
Welcome back! The quest for low transmission fluid temperatures continues. Once we developed our goals and plan of action for this project, our engineering team went to work, grinding, welding, bending, and cutting. Our first prototype design was quite unique. We mounted one of our 19-row, stacked-plate fluid coolers next to the liquid-to-liquid transfer unit. This is the same location as the turbocharger on the previous generation of EJ engines. Check out the beginning of the mock-up below!
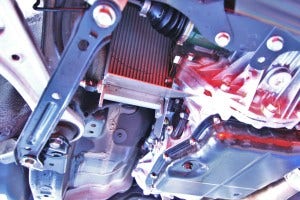
Prototype 1 mock-up
The primary concern with this location is airflow. This cooler utilizes external fins to promote the exchange of heat with the liquid running through the cooler. Without airflow, the effectiveness of this cooler is significantly diminished. The primary benefit of this location is packaging. Our lines will be short, which will alleviate any concerns about loss of fluid pressure. Also, it provides room in the front of the vehicle for a front-mount intercooler upgrade. To promote additional airflow, our team developed and fabricated a duct to pull air from underneath the vehicle into the cooler. Check out a few shots!
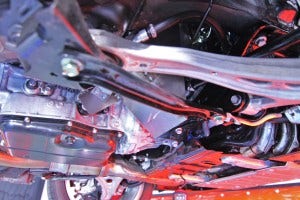
Prototype 1 duct fabrication
Prototype 1 duct fabrication
Another minor concern would be ground clearance. Enthusiasts use and/or modify their vehicles in various ways. Someone using a WRX for rally or rallycross events might be concerned with debris that could damage this cooler and scoop. Anyone who lowers a vehicle would need to consider the ground clearance of this component.
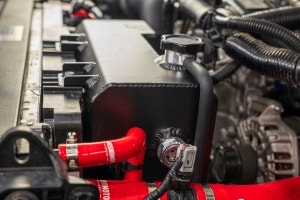
Now, once we had this prototype installed, we needed to test it adequately. To do so we would first require baseline data to compare with data for our kit. We stripped off our prototype and attached our temperature/pressure sensors.
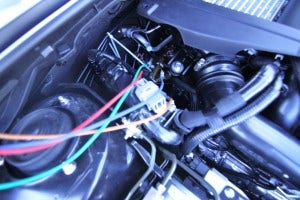
Temperature/pressure sensors
Temperature/pressure sensors
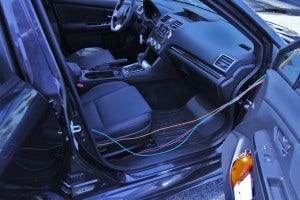
Then we hit the road to capture some data!

Road testing prototype 1
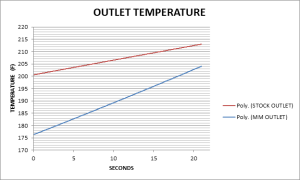
We tested this kit in a controlled highway driving situation, and we also evaluated temperatures during launch control use and pulls to 60-80 mph. The chart below shows the temperature differences between the OEM cooler and the added Mishimoto unit from a launch.
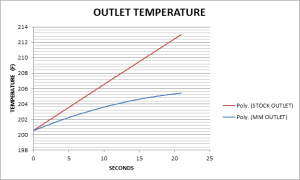
Prototype 1 data
As you can see, the stock cooler starts at around 201°F (94˚C) and then rises both steeply and quickly to around 213°F (101˚C) after 20 seconds at full throttle. The Mishimoto cooler starts at a similar temperature and rises to around 205°F (96˚C), which is not quite as high as the stock setup. The stock plot showed no signs of leveling off, while the Mishimoto setup began to taper down. This was only one pull; It would be interesting to see temperatures in a repeated environment such as a road course.
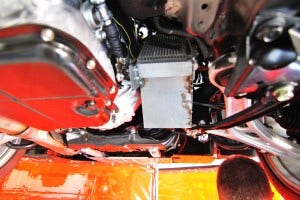
To take this design a bit further, we decided to strap an electric fan to the cooler to see the effect on temperature. A fan would provide protection against heat-soak during idle conditions when airflow would not be present. The final iteration would include an adjustable fan controller, which would allow the user to specify activation temperature. I'm getting a bit ahead of myself though!
Next, we needed to evaluate the performance benefits of adding a small fan, so we fitted our 8" fan to the cooler. Check out the setup below.
Prototype 1 with fan
Prototype 1 with fan
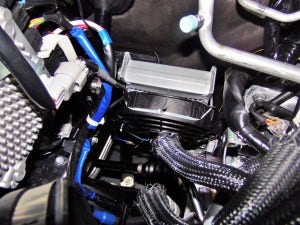
Prototype 1 with fan
After we completed the temporary mock-up, we again hit the road to collect more data!

Road testing prototype with fan
After the road test, we returned to our facility and dove into our data to compare the performance of this new setup with both the stock and the cooler alone.
Prototype 1 with fan data
The stock plot follows the same path as in the previous test. The Mishimoto plot with fan installed is quite interesting. As you can see, the temperature prior to the start of the run is much lower than both stock and the previous setup. At this time, the fan is in motion, which is why the temperatures start at around 176°F (80˚C). By the end of the pull, temperatures reach around 204°F (96˚C), which is not much improvement over the previous design. The major benefit, however, would be the reduction in heat-soak at idle, which certainly seems to help. Another interesting point is the plot line. The Mishimoto line is still on a steep slope upward, similar to the stock unit. It is likely being affected negatively by the airflow reduction from the mounted fan.
After observing this data, we realized we would need to improve airflow, so we decided to make a few additional prototypes. Check back next time for another round of product development!
Thanks!