Pontiac GTO Oil Cooler R&D, Part 1: Oil Adapter and Initial Development
We reached out to the forums earlier this month with a request for a GTO owner to lend us his vehicle for product development. The response was substantial. Our inbox quickly filled with messages from enthusiasts willing to help out. We got a similar response last year when we developed an aluminum radiator for the goat. Before jumping into this GTO oil cooler product development, we want to extend a huge thank you to the GTO community for supporting us and for offering recommendations on new projects and product design.
The Test Subject
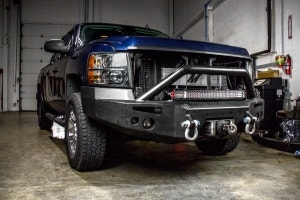
Our test vehicle came all the way from New York, brought to us by a generous fellow named Tom. This model, a 2004, features a bold Yellow Jacket paint scheme along with a manual transmission. Very nice combination!

Test vehicle for GTO parts development
Although the car is in good shape, inside and out, Tom has big plans that include some restoration work. The plate is quite fitting for this vehicle. Definitely a neat touch.

Test vehicle for GTO parts development

Test vehicle for GTO parts development
Enough about the car. Let's get started on some product development.
Oil Line Adapter
The goat went up on the lift so we could begin tackling product development.

Test vehicle on lift for Pontiac GTO parts development
With the filter removed, we get a good look at the oil filter housing area.
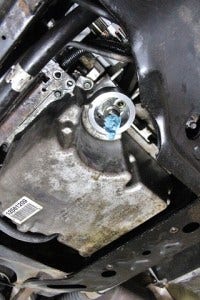
Pontiac GTO parts development
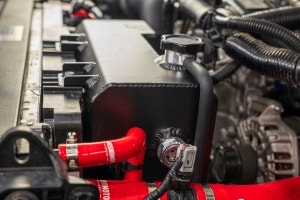
The two studs coming off the housing is the attachment point for our oil line adapter. Luckily, we tackled the design of our adapter some time ago, so this was ready to test fit. Below is a look at our adapter in place!

Mishimoto Pontiac GTO parts installed
Fitment was a bit tight due to strict clearances. We have some light adjustments to make to our design, but this prototype will suffice for testing purposes. As you can see, we've mocked up some line fittings to see how challenging the routing will be.
Initial Bracket Fabrication
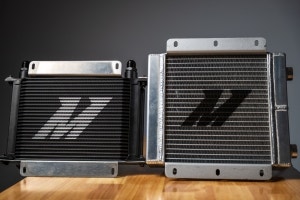
Now that we've fitted the adapter, we need to work on the other end of our GTO oil cooler project, our heat exchanger. Due to the size of the LS, we will be going with our largest oil cooler, a 25-row unit.
This cooler features a large surface area, meaning it will exchange heat with extreme efficiency. Fluid capacity should increase by around .75 quarts with the added volume of this heat exchanger and the lines.
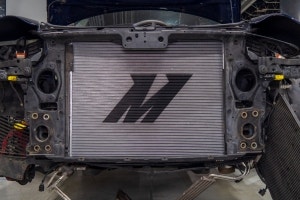
First, we lowered the GTO and removed the bumper to see what kind of space we were working with.

Pontiac GTO parts development
We know enough about these vehicles to understand that OTR intakes are a big deal and quite common. Because of this, we will be sure to avoid the space they typically occupy.
We also need to consider the power steering cooler, which runs along the lower portion of the grill.

Power steering cooler
We decided the passenger side of the upper grill would best suit the footprint of our GTO oil cooler. The GTO bumper has some pretty slick ducts on this portion of the grill, which we intend to take full advantage of.
GTO parts development
Coming Up
We have tons of work left on this GTO oil cooler project. Check back next time for a look at our oil cooler mounting bracket design process. Down the line we will be road testing this setup to evaluate the benefits of the liquid-to-air heat exchanger.
Feel free to recommend any other Pontiac GTO parts you would to see our team develop.
Thanks for reading!
-John