BMW E36 Aluminum Coolant Expansion Tank R&D, Part 2: Initial 3D Model and Prototype
Interested in picking up this aluminum E36 expansion tank? Check out our product page linked below!
BMW E36 Aluminum Coolant Expansion Tank!
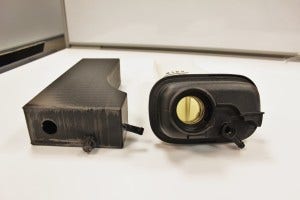
Time to break open the stock tank and see what lies within. If you follow some of our other development projects, you would know that we recently split an E46 3-series expansion tank and found quite a complex system including both internal and external features. Although this added some complexity and difficulty to the project, it seemed like our engineers enjoyed the challenge.
Stock Expansion Tank Internals
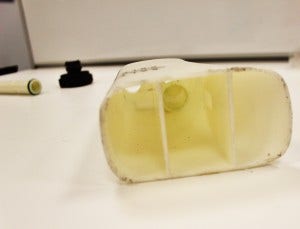
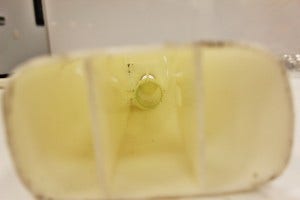
First, before we slice this guy in half, a look inside the tank from the cap.

Stock expansion tank, internal design
We can see from this shot that the tank does indeed feature a unique internal chamber. A tube appears to run the full length of the tank. Let's get to the band saw so we can split this component for evaluation.
Stock expansion tank, internal design

Stock expansion tank, internal design
Stock expansion tank, internal design
The internal tube is easily removed and is shown below. It seals with O-rings on both the upper and lower portions of the tank.

Stock expansion tank, internal tube
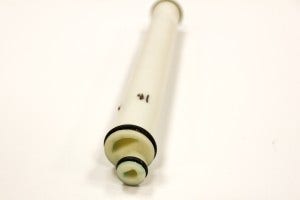
Stock expansion tank, internal tube
This tube connects between the fill neck and the lower portion of the tank. It works as an internal expansion chamber to relieve pressure and properly bleed air from the coolant.
We would need to incorporate this feature into our design to ensure stock-like functionality.
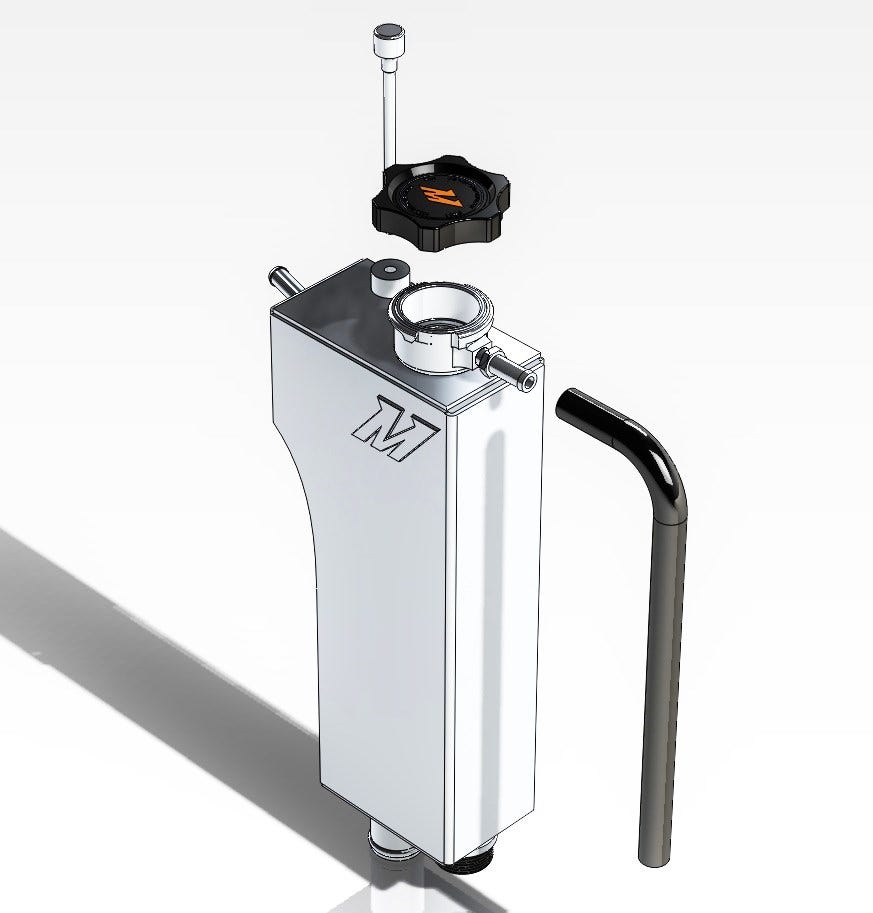
3D Modeling
Instead of jumping into fabrication of a prototype from aluminum, we decided to take a slightly different approach for this project. We began by creating our design in Solidworks, after which we would use our 3D printer to create a prototype for checking fitment. Check out some of the shots from the modeling process.
Mishimoto expansion tank rendering
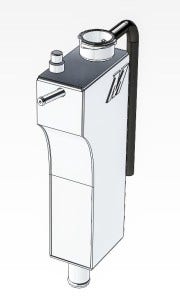
Mishimoto expansion tank rendering
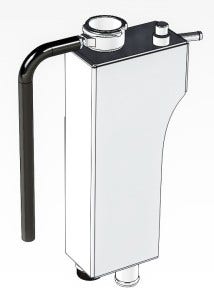
Mishimoto expansion tank rendering
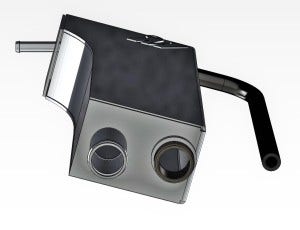
And here's a shot of the two ports on the base of the tank.
Mishimoto expansion tank rendering
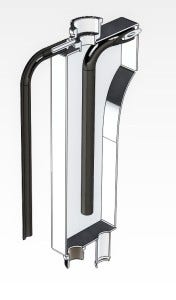
Check out the nice cutaway below showing the internal tube that will function in a similar fashion to the stock plastic unit.
Mishimoto expansion tank cutaway
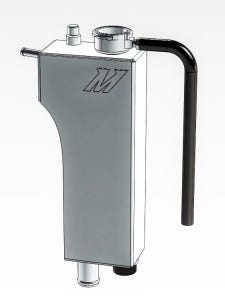
Our final renderings show the Mishimoto expansion tank cap and bleeder/dipstick.
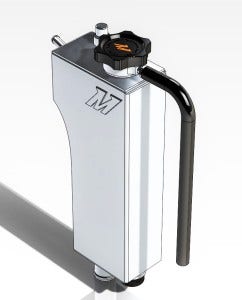
Mishimoto expansion tank, final design
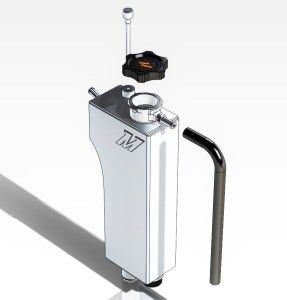
Mishimoto expansion tank, final design
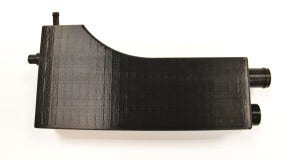
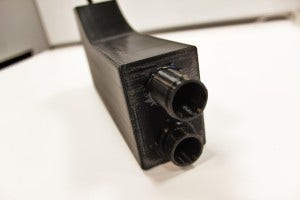
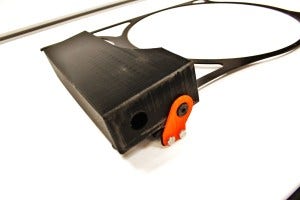
3D-Printed Prototype
With a solid model complete in 3D, we could now turn this digital component into something we could handle and install to verify fitment. We fired up our new 3D printer and knocked out a prototype.

3D printing of Mishimoto expansion tank prototype
The fittings and ports were printed separately and attached after the print was complete. Check out a few shots of our assembled prototype.
3D-printed Mishimoto expansion tank prototype
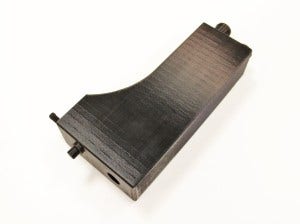
3D-printed Mishimoto expansion tank prototype
3D-printed Mishimoto expansion tank prototype

3D-printed Mishimoto expansion tank prototype
Check out a couple shots of our tank next to the stock unit.
3D-printed Mishimoto expansion tank prototype (left) and stock expansion tank (right)
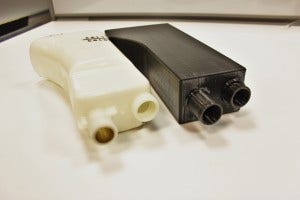
Stock expansion tank (left) and 3D-printed Mishimoto expansion tank prototype (right)
Test Fitting
After collecting a few dimensional notes regarding our prototype, we brought a test vehicle into the shop and fit our component into place. Below is a before and after shot comparing the stock tank to our prototype unit mocked into position.
Stock expansion tank installed (left) and 3D-printed Mishimoto expansion tank prototype installed (right)
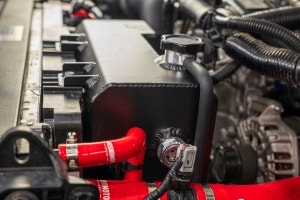
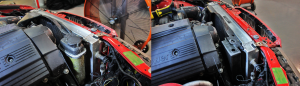
We then installed this expansion tank on our prototype electric fan mount. This is another project we have been working on for the E36.
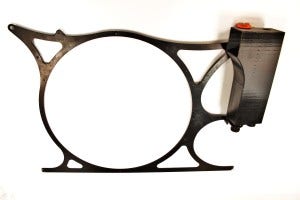
Mishimoto prototype expansion tank and fan shroud assembled
Mishimoto prototype expansion tank and fan shroud assembled
Up Next!
Check back with us for a look at our final prototype! We will be installing this unit on our test vehicle to ensure both fitment and proper functionality.
Thanks
-John